Who is this for? #
An Administrator or Admin Assistant who wants to see every director across all of the organizations in their Admin Portal in one place — and add, update, or remove directors without switching into each organization one at a time.
What is the Directors page? #
The Directors page lists every director in every organization connected to your Admin Portal in a single table. From that one table you can add a director to any organization, change which director leads an organization, change a director to a helper, or remove a director. Each of those actions used to require switching into the organization first.
Tip
This is not the same as the Directors page inside a single organization. That page shows only the directors of the organization you are currently viewing, and it is the one your directors use day to day. See Add Assistant Directors and Staff for that page.
Directors table #
Switch to your Admin view using the Profile menu in the top right.
Choose the Directors item in the left navigation menu, just below Organizations.
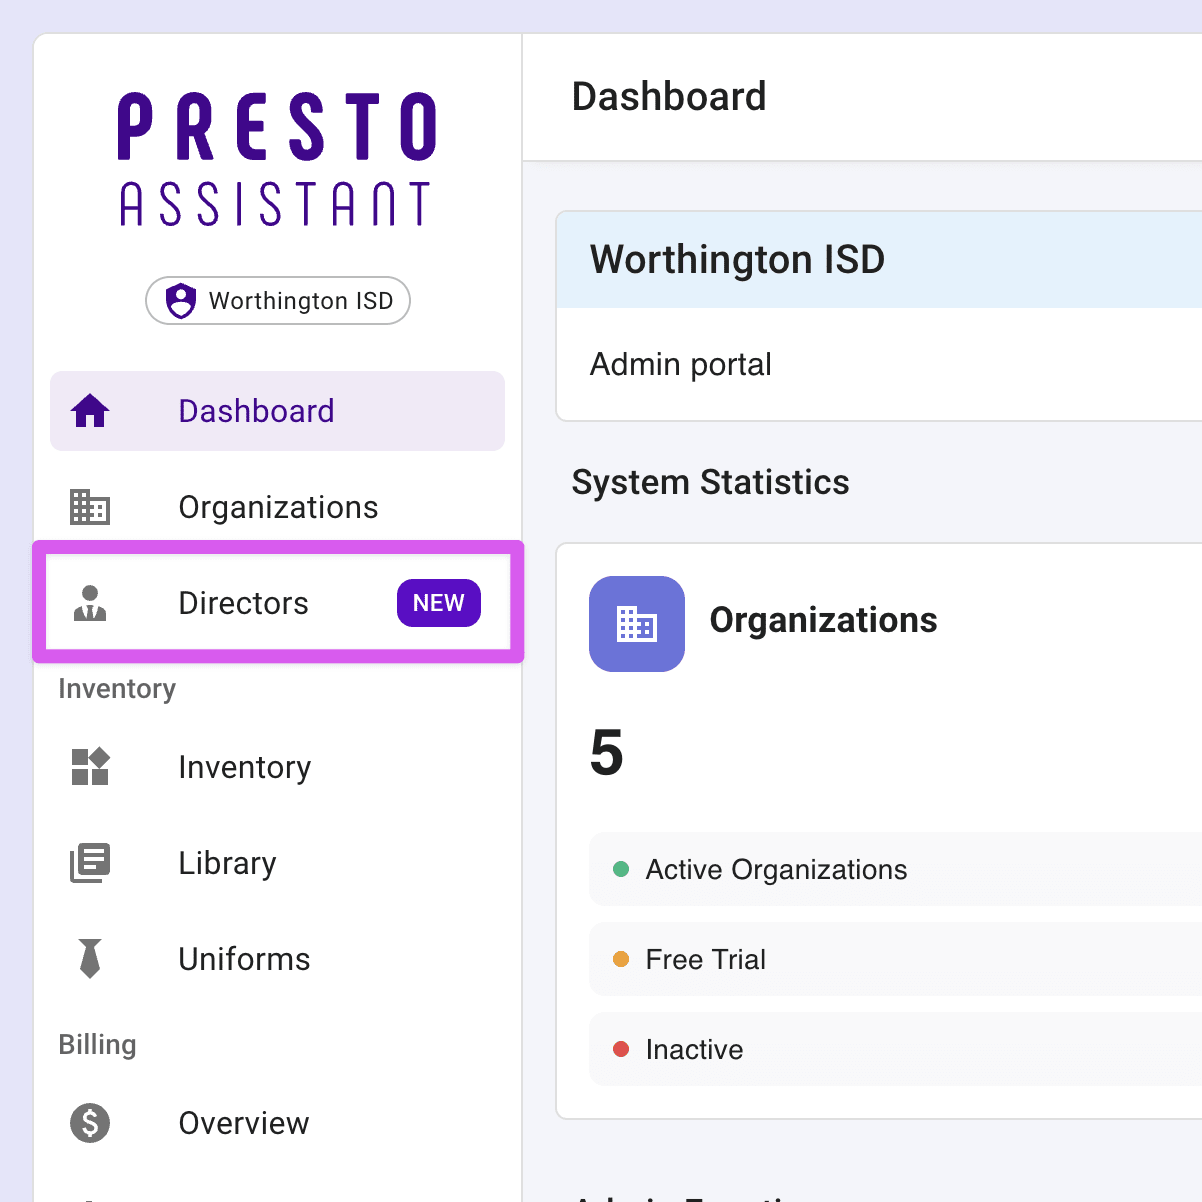
The table shows one row per director, with these columns:
- Campus Type — the kind of campus the organization belongs to, such as High School or Middle School.
- Organization Type — the kind of organization, such as Band, Choir, or Orchestra.
- Organization — the name of the organization.
- Last Name, First Name, and Email — the director's contact information.
- Lead Director — checked when this director leads their organization. (The lead director was previously called the head director.)
At the bottom of the table, # of Directors: shows how many directors you have across all of your organizations.
Grouped rows #
When your Admin Portal has more than 10 directors, the table opens grouped under a Campus / Organization column. Directors are grouped by campus type, then organization type, then organization. Press the arrow next to a group to expand it and see the directors inside.
Campus types are ordered from oldest to youngest students — college, high school, middle school, then elementary — rather than alphabetically.
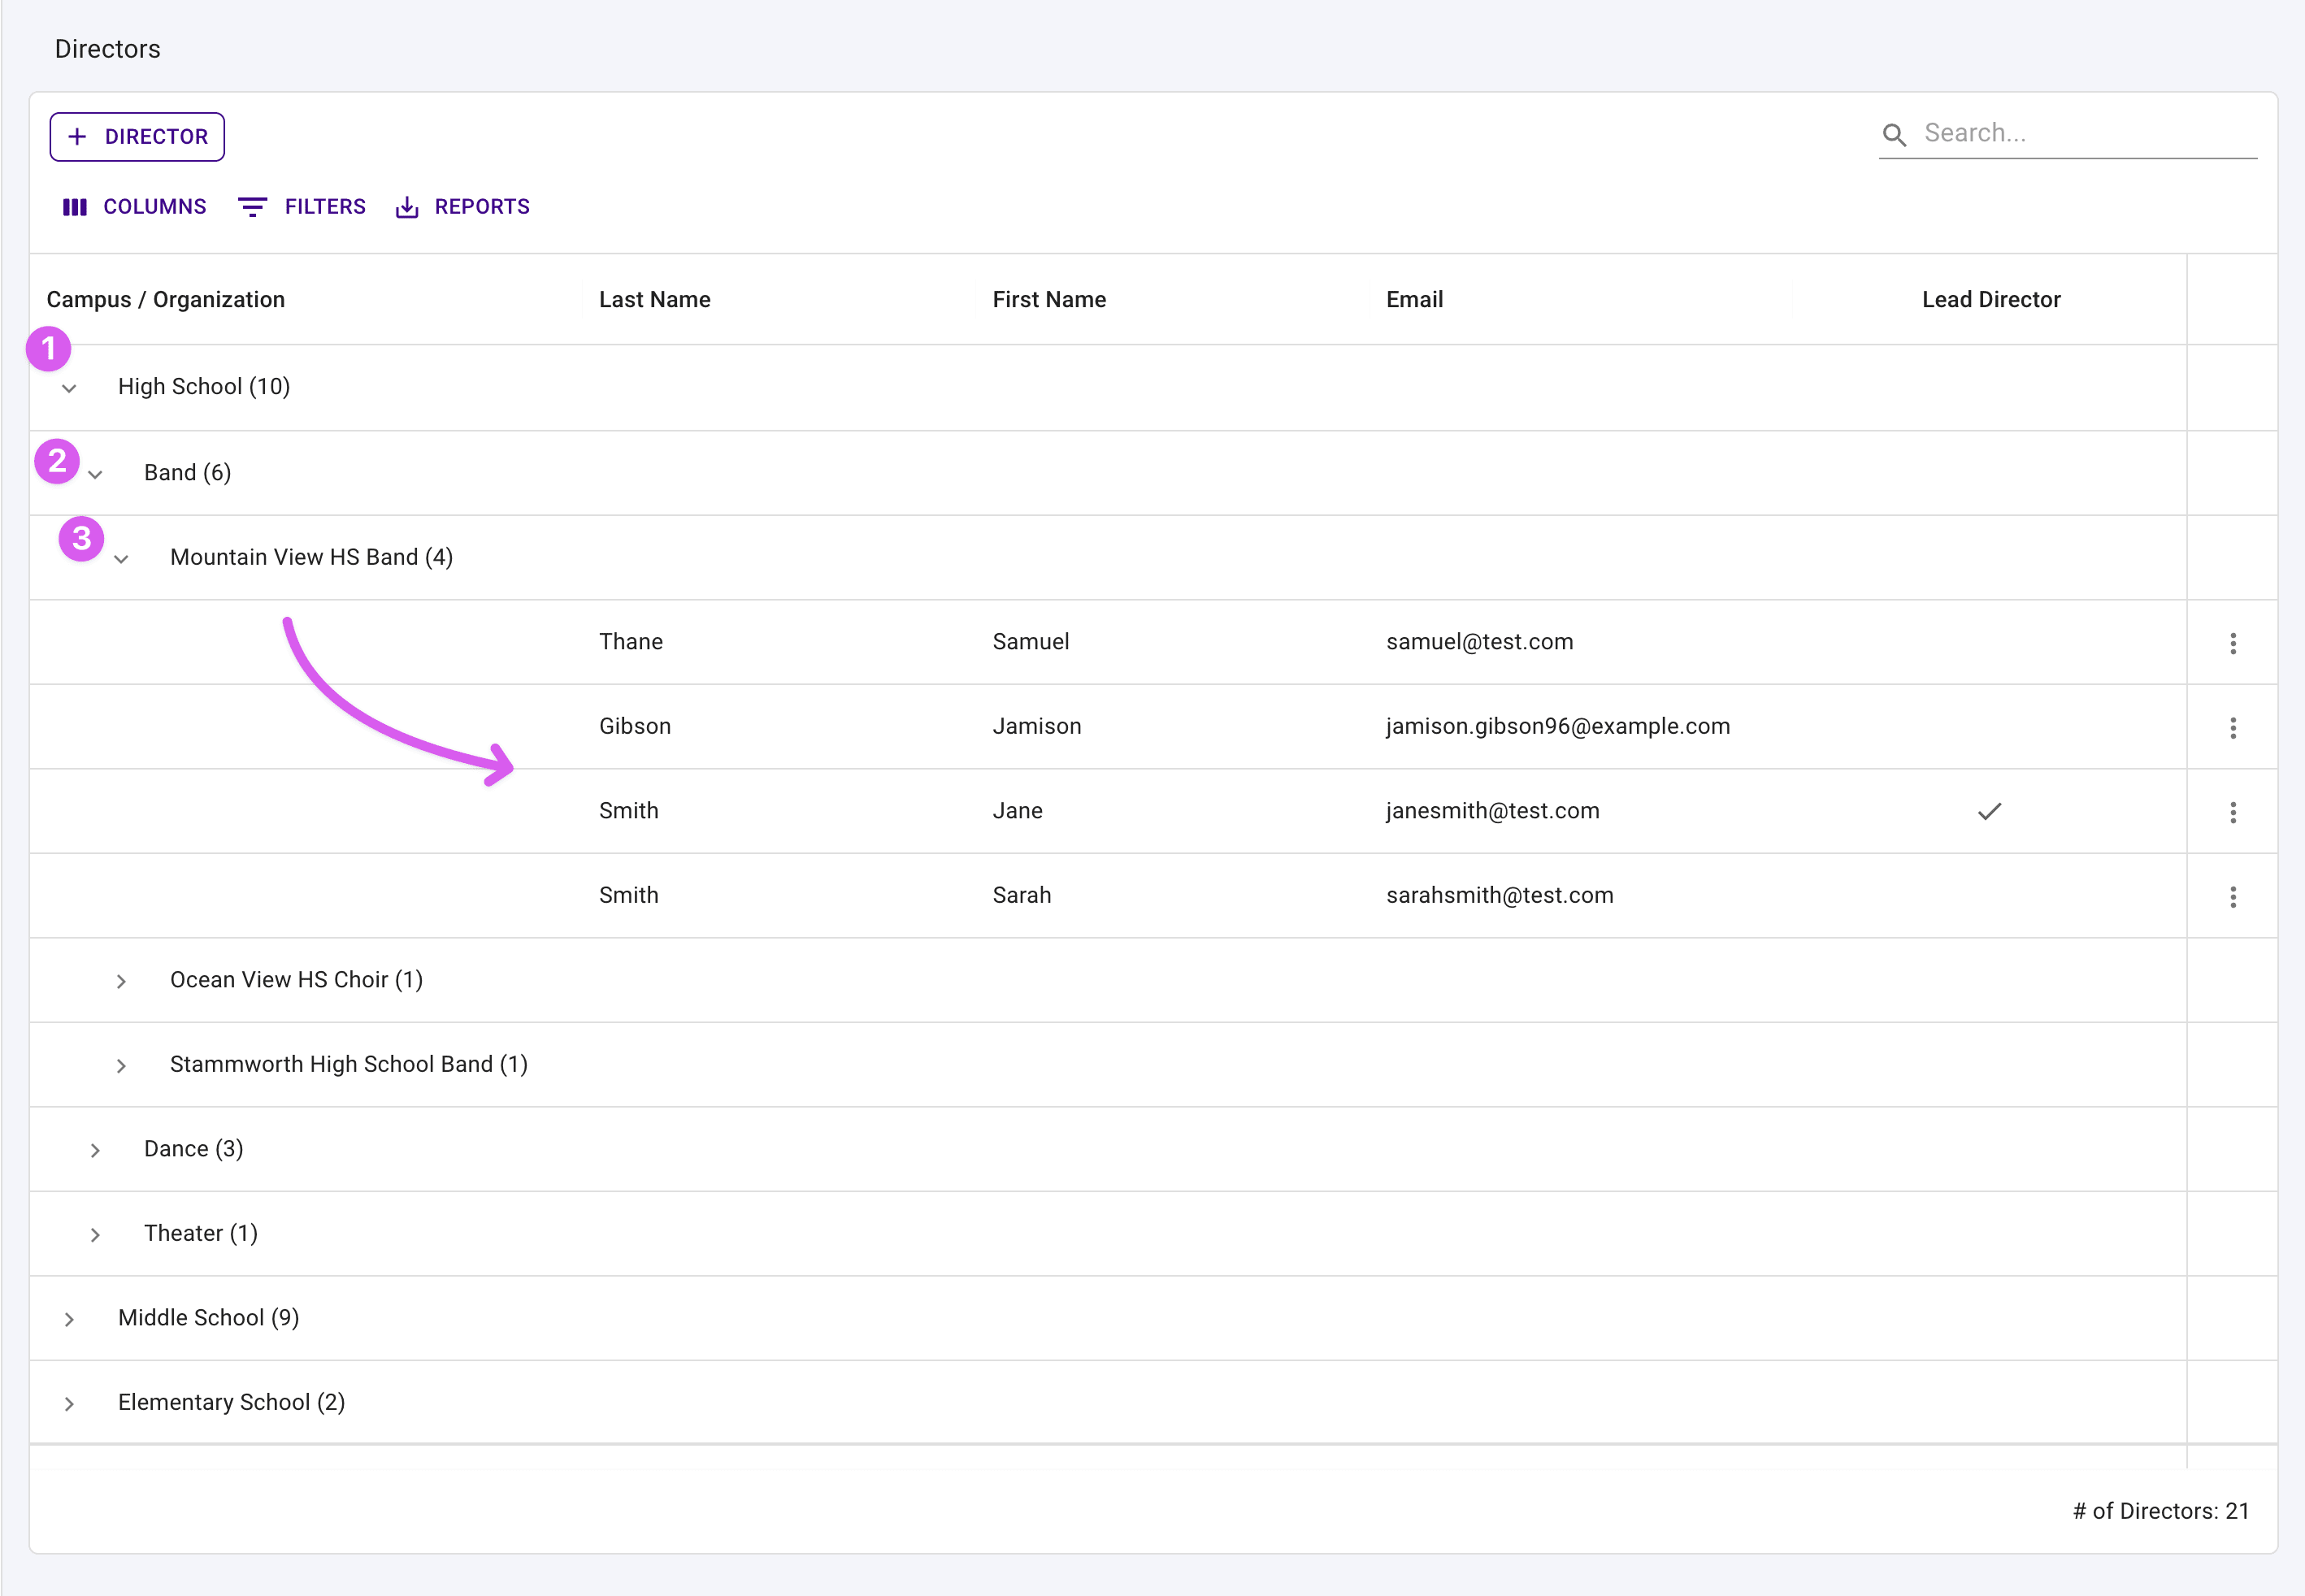
If you have 10 or fewer directors, the table opens as a flat list instead, since a short list reads fine without grouping.
Tip
Presto decides whether to group the table when the page first loads, so the layout will not change under you as directors are added and removed. If you would rather see a flat list, choose "Ungroup" from the Campus / Organization column menu.
Search and filter #
Use the search box above the table to quickly narrow the list of directors.
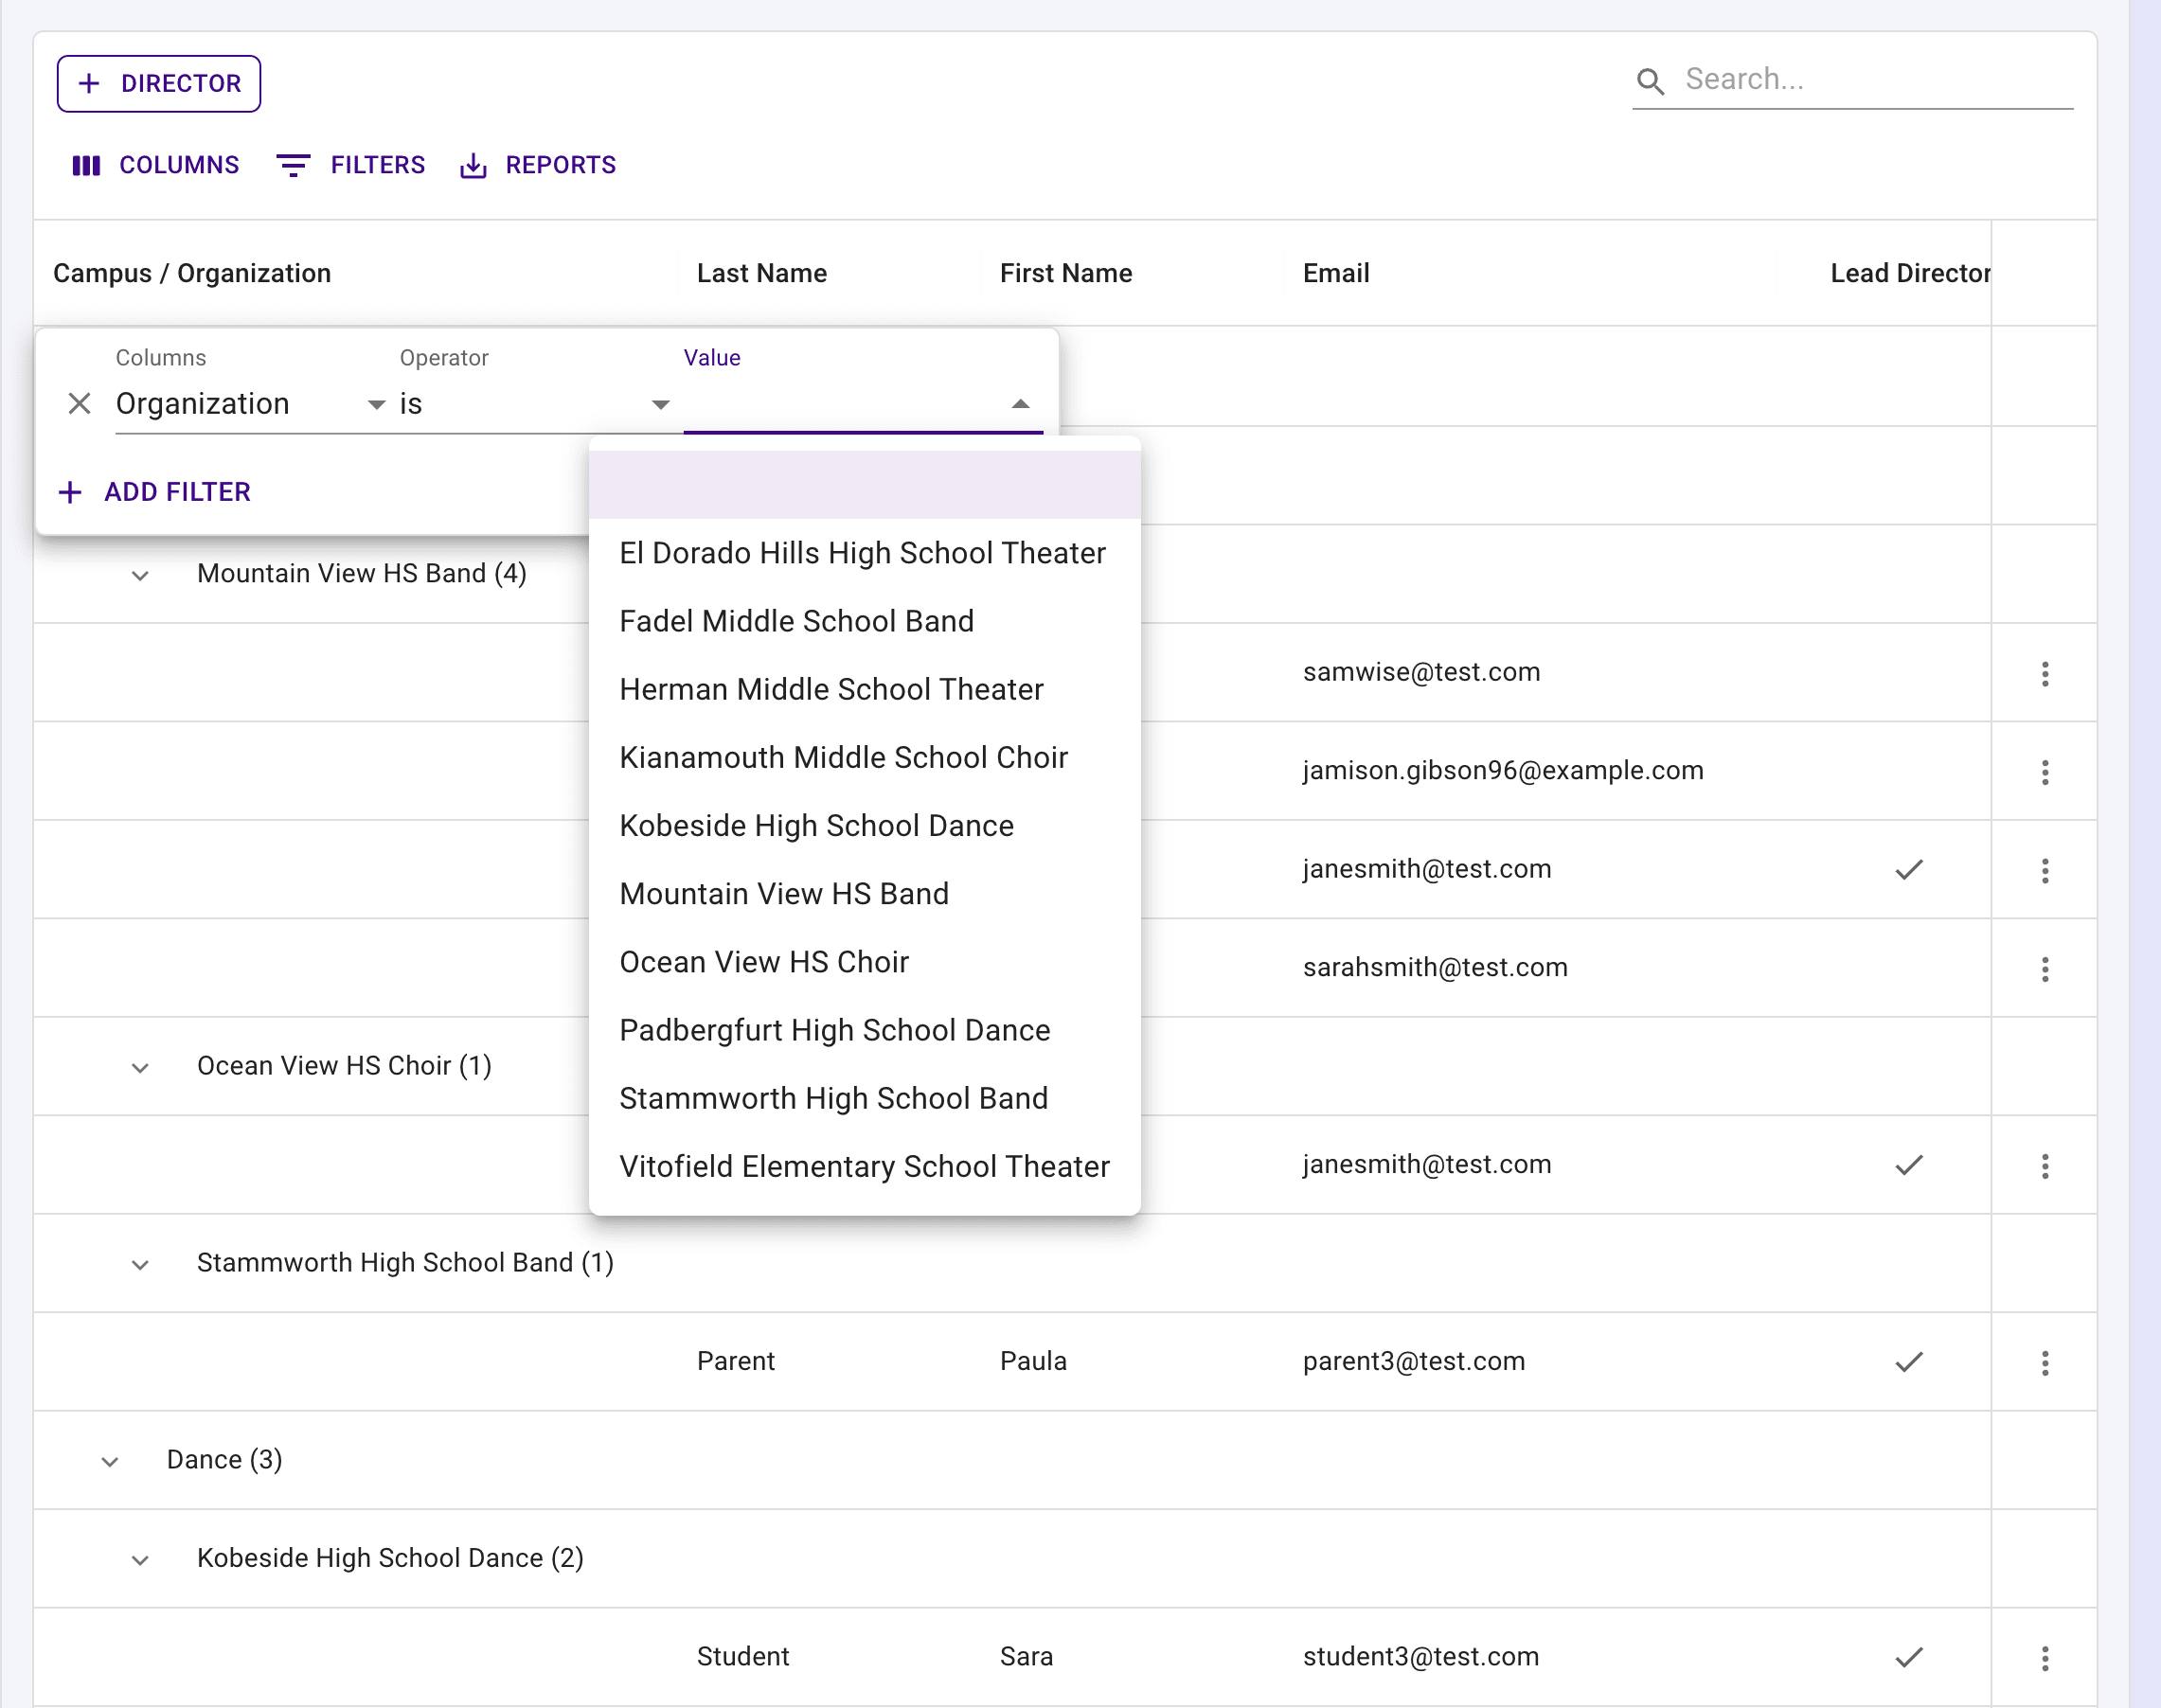
For more specific results, open the filter panel. Campus Type, Organization Type, and Organization are dropdowns, and each one lists only the values you actually have directors for, so the options always reflect your real organizations.
Tip
Searching or filtering expands every group, so a match inside a collapsed organization is still visible. Clearing the filter restores whichever groups you had expanded. While filtered, the footer reads # of Directors: N of M so you can see how many of your directors matched.
Add a director #
Press the "Add Director" button at the top of the table.
Start typing in the Organization field and choose the organization the new director belongs to.
Enter the director's First Name, Last Name, and Email.
If this director should lead the organization, check "Set as Lead Director". This replaces the organization's current lead director.
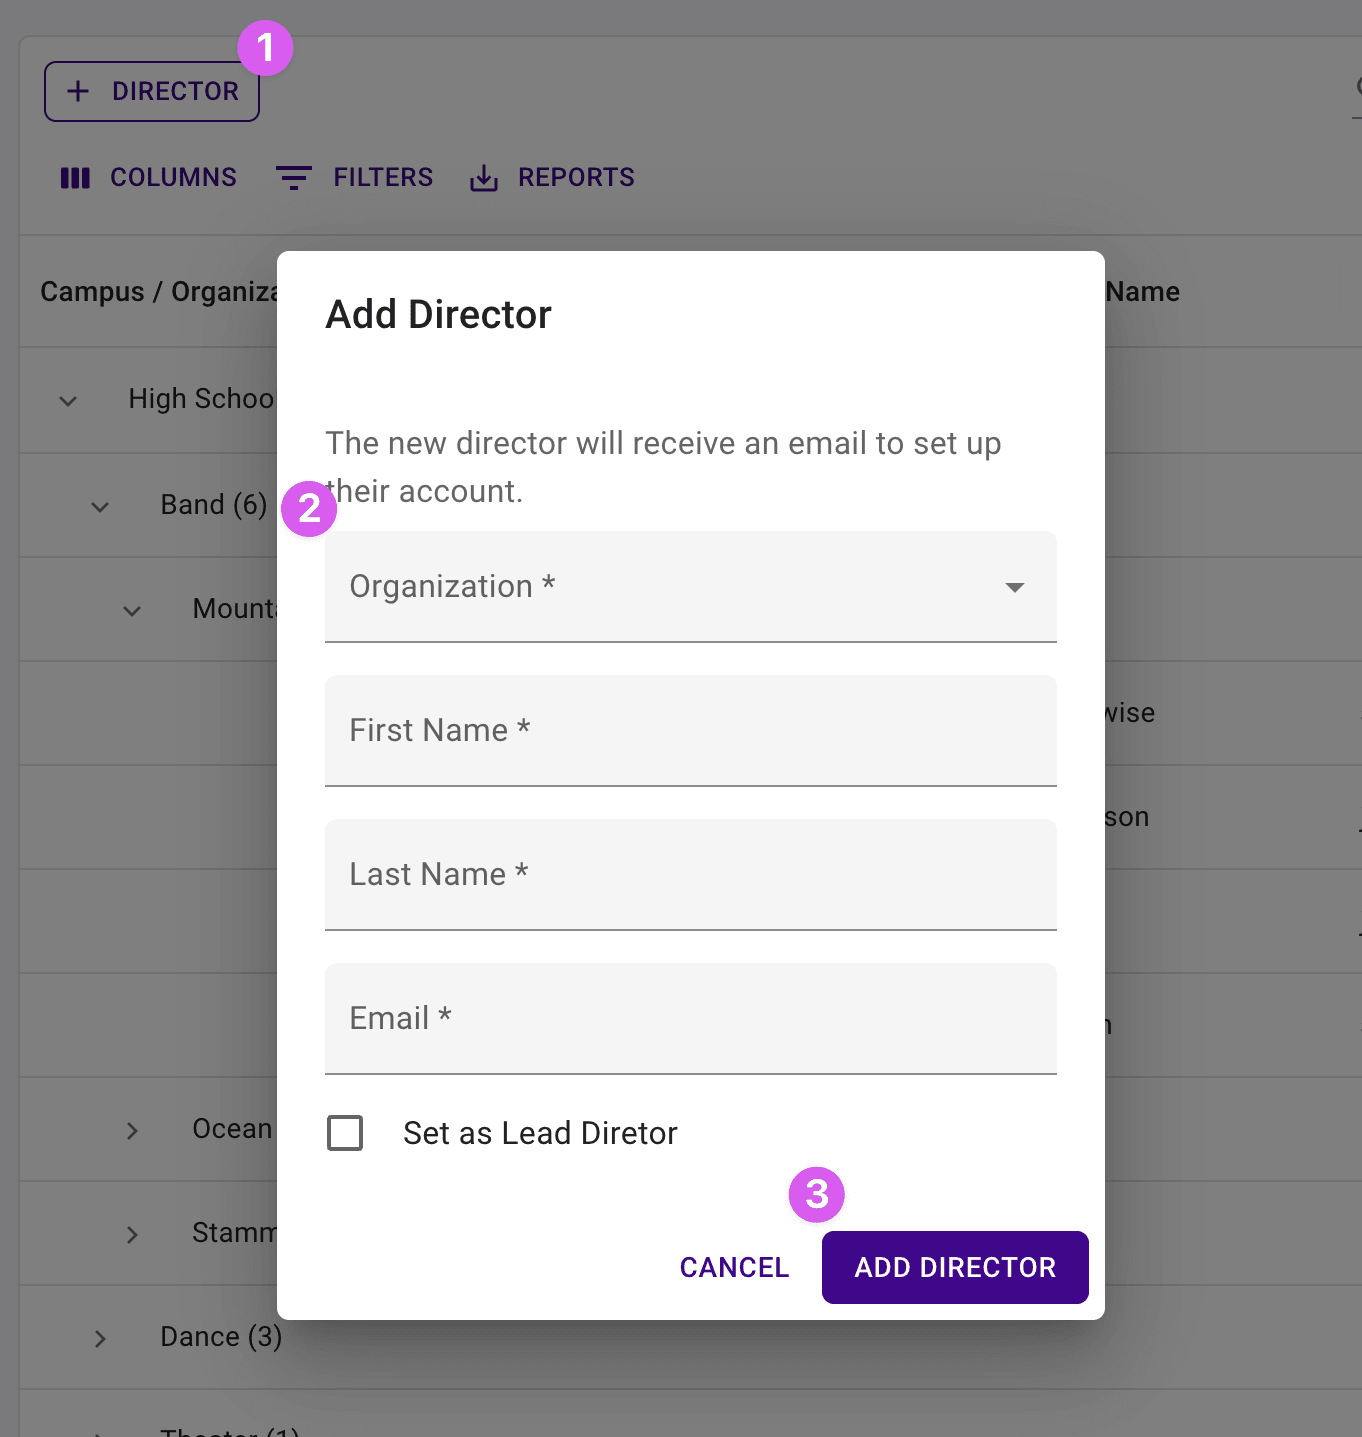
- Press the "Add Director" button to finish.
Tip
The new director will receive an email to set up their account. You stay in your Admin Portal the whole time — adding a director here never switches you into their organization.
Change to Lead Director #
Each organization has one lead director. To hand that role to someone else:
Find the director in the table and open the actions menu at the end of their row.
Choose "Change to Lead Director".
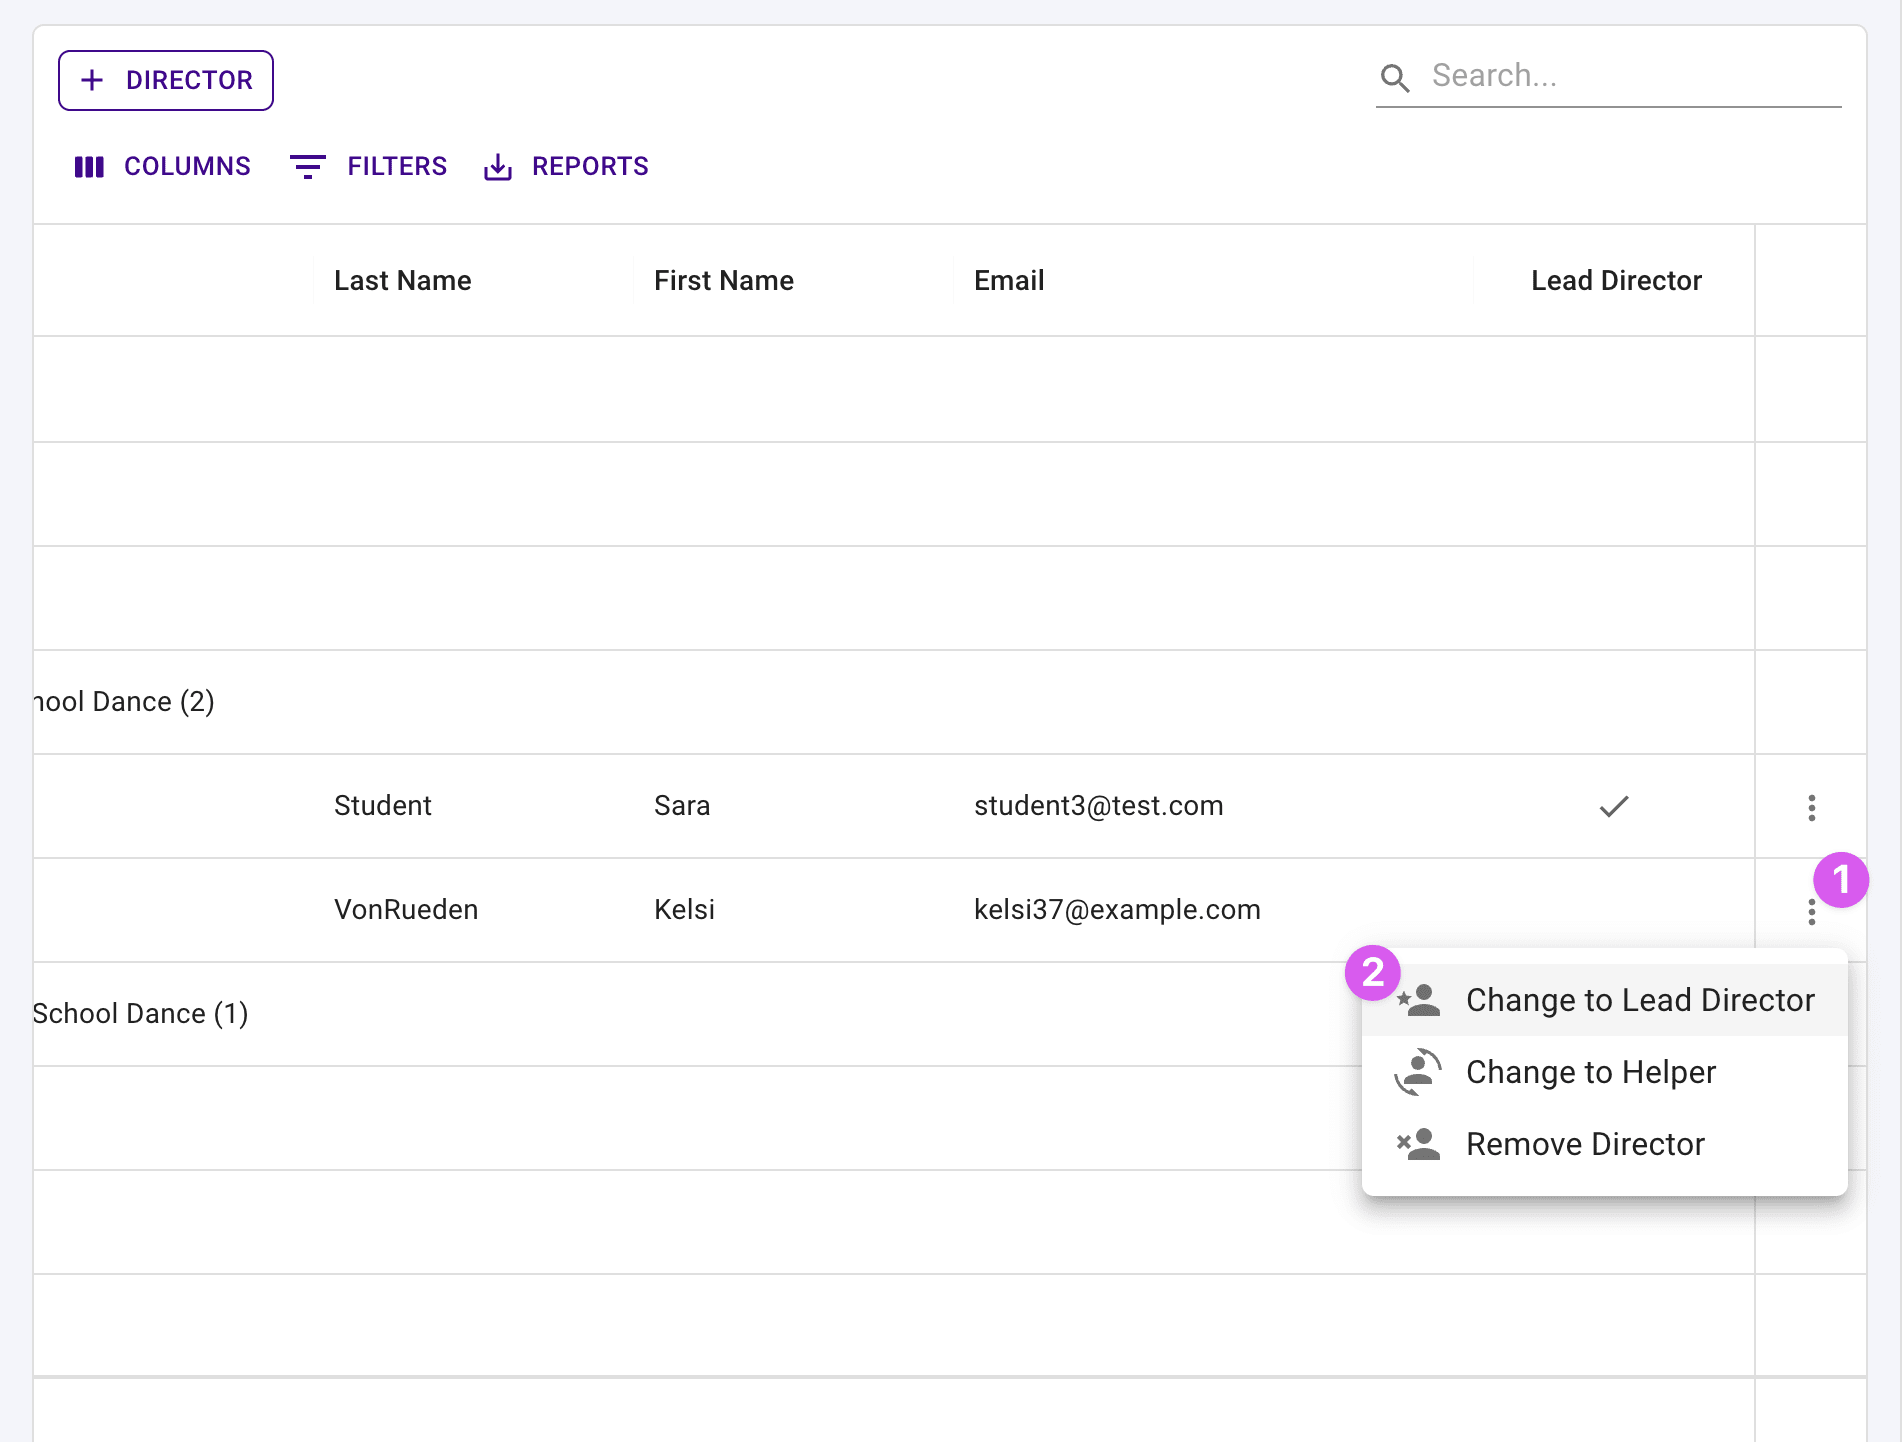
- Confirm the change by pressing "Yes, Change".
The Lead Director column updates right away.
Tip
This action does not appear on a director who already leads their organization. You can also change an organization's lead director from the Organizations table — see Change Lead Director.
Change to Helper #
If a director should stay with the organization in a supporting role instead, change them to a helper.
Open the actions menu at the end of the director's row and choose "Change to Helper".
Enter a Helper Title describing their role. This starts as "Helper", and you can change it to anything that fits, such as "Booster President" or "Student Librarian".
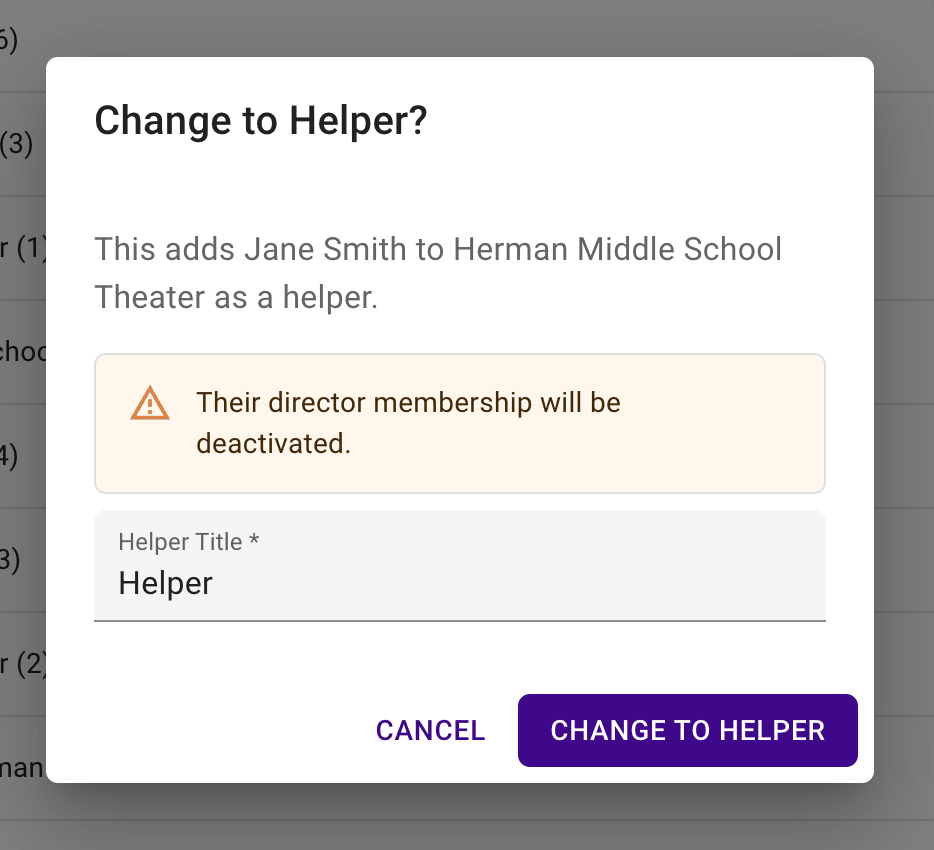
- Press the "Change to Helper" button.
Tip
Changing a director to a helper deactivates their director membership, so they will no longer appear in the Directors table. Read Manage Helpers to learn what helpers can do.
Remove a director #
Open the actions menu at the end of the director's row and choose "Remove Director".
Confirm by pressing "Yes, Remove".
The director is removed from their organization and leaves the Directors table. To learn more about removing people from an organization, read Remove a Member.
Next steps #
- Share Add Assistant Directors and Staff with your directors so they can add staff to their own organizations.
- Review what each director can access with Manage User Permissions.
- Learn what helpers can do in Manage Helpers.
- Need to connect more organizations? See Add Organizations to an Admin Portal.