Who is this for? #
Directors who need to keep track of something member by member — whether the member does it, like passing off an étude, or you do it for them, like taking their photo.
What is a Checklist? #
A Checklist has two parts: a list of members and a list of checklist items. Put them together and you get a grid, with a box to check for every member and every checklist item. You name the checklist and write its items yourself, so a checklist can track whatever you need it to.
Examples of checklists you could create
- Audition Requirements — scales, sight-reading, and prepared excerpts each member has passed off
- Yearbook Photos — check off each member as you photograph them
- Sectional Attendance — one item per sectional, checked as members attend
- Locker Assignments — note which members have been given a locker and combination
- Travel Prep — itineraries handed out, rooming assignments given, medical info on file
- Senior Exit Requirements — everything a graduating member needs to wrap up
A Checklist is scoped to one school year, so it's built for tracking something this year rather than something that carries over to the next.
Tip
Checklists are the catch-all for what Presto doesn't already track for you. When there is a purpose-built tool, use it — those features give you far more than a checkbox:
- Paperwork, permission slips, and signatures → build a form.
- Money owed or collected → use fees and payments in Finances. See Waive, Remove, or Delete Fees.
- Instruments, uniforms, and music handed out → use Inventory, Uniform, and Library checkouts. See Using Barcodes for Inventory, Uniforms, and Library Items.
Create a Checklist #
Creating a checklist is a 3-step process: Info, Members, and Items.
From the left navigation menu, press "Checklists".
Press the "+ Checklist" button.
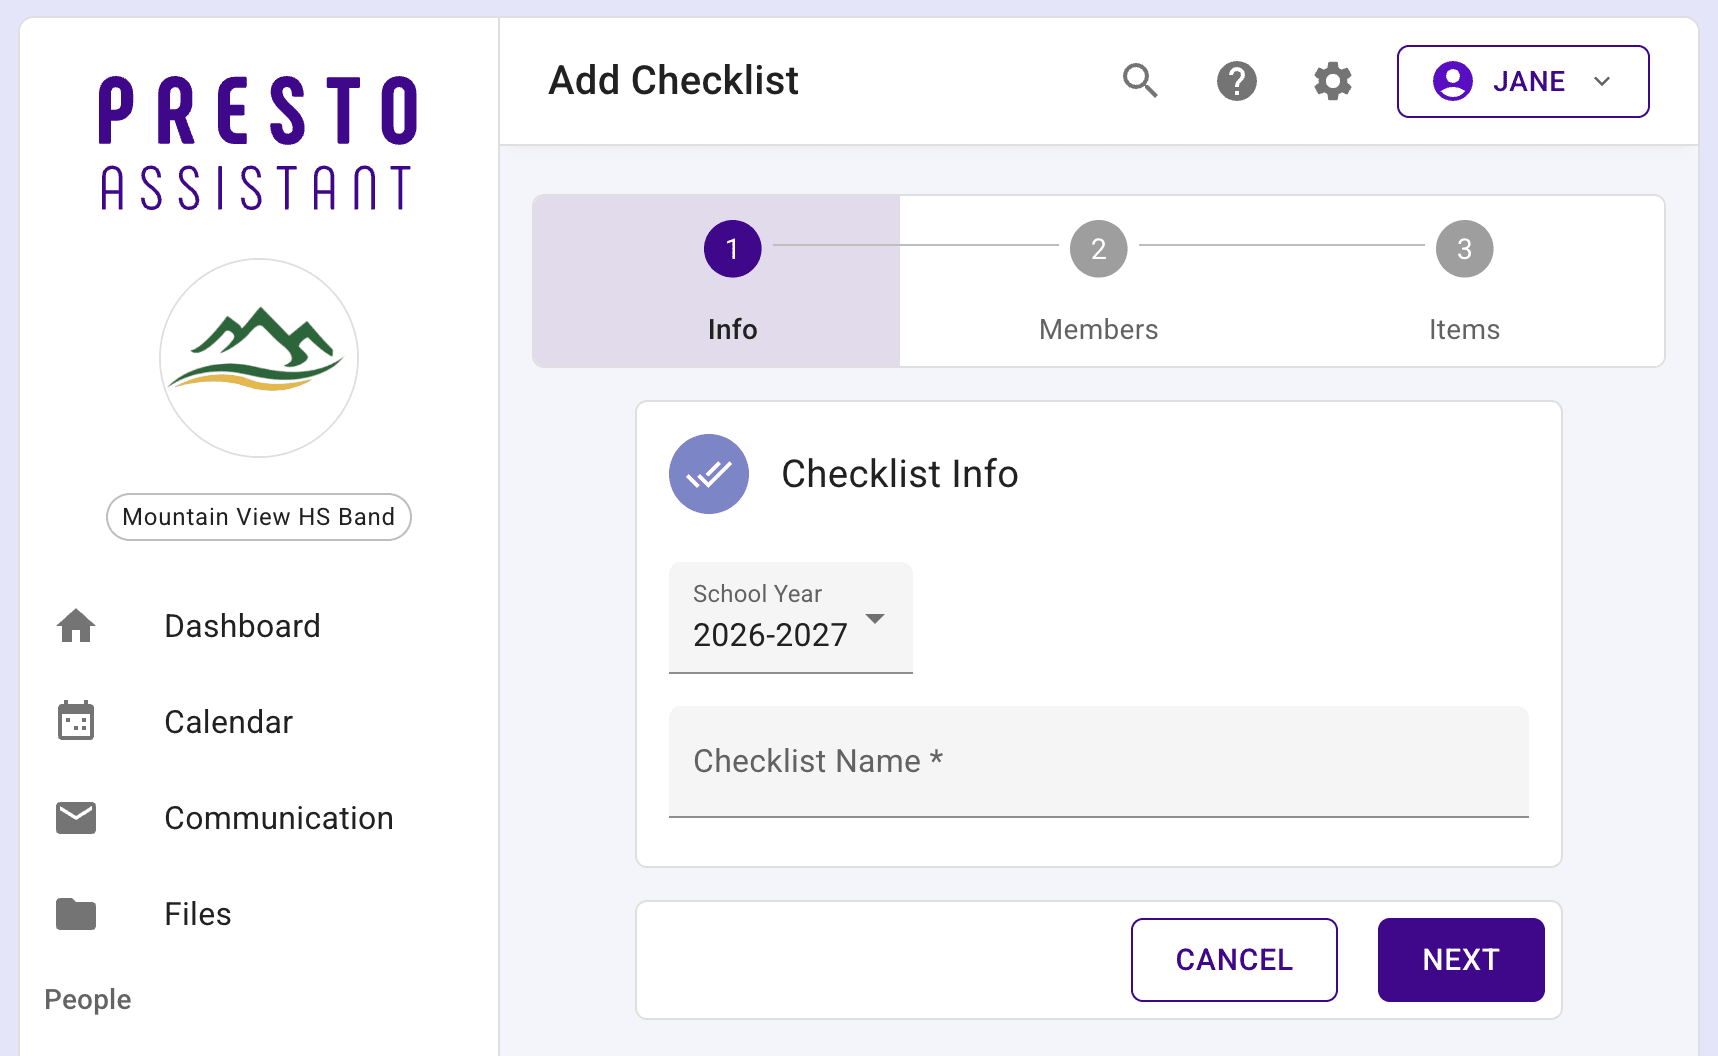
On the Info step, enter a "Checklist Name", then press "Next".
On the Members step, press "Select Members" and choose everyone this checklist applies to.
Once you've selected members, the page shows how many are assigned. Press "Next" to continue, or "View/Update Members" later if you need to change who's assigned.
On the Items step, enter a name for each item under "Checklist Item", check "Required" if it applies, and press the + button to add it. Repeat for every item on your list.
Tip
Marking an item "Required" doesn't block anything on its own — it's a label to help you tell the must-do items apart from optional ones.
- Press "Done" when you've added everything.
Track Completion #
Once a checklist has members and items, its page shows a table with one row per member and one column per item.
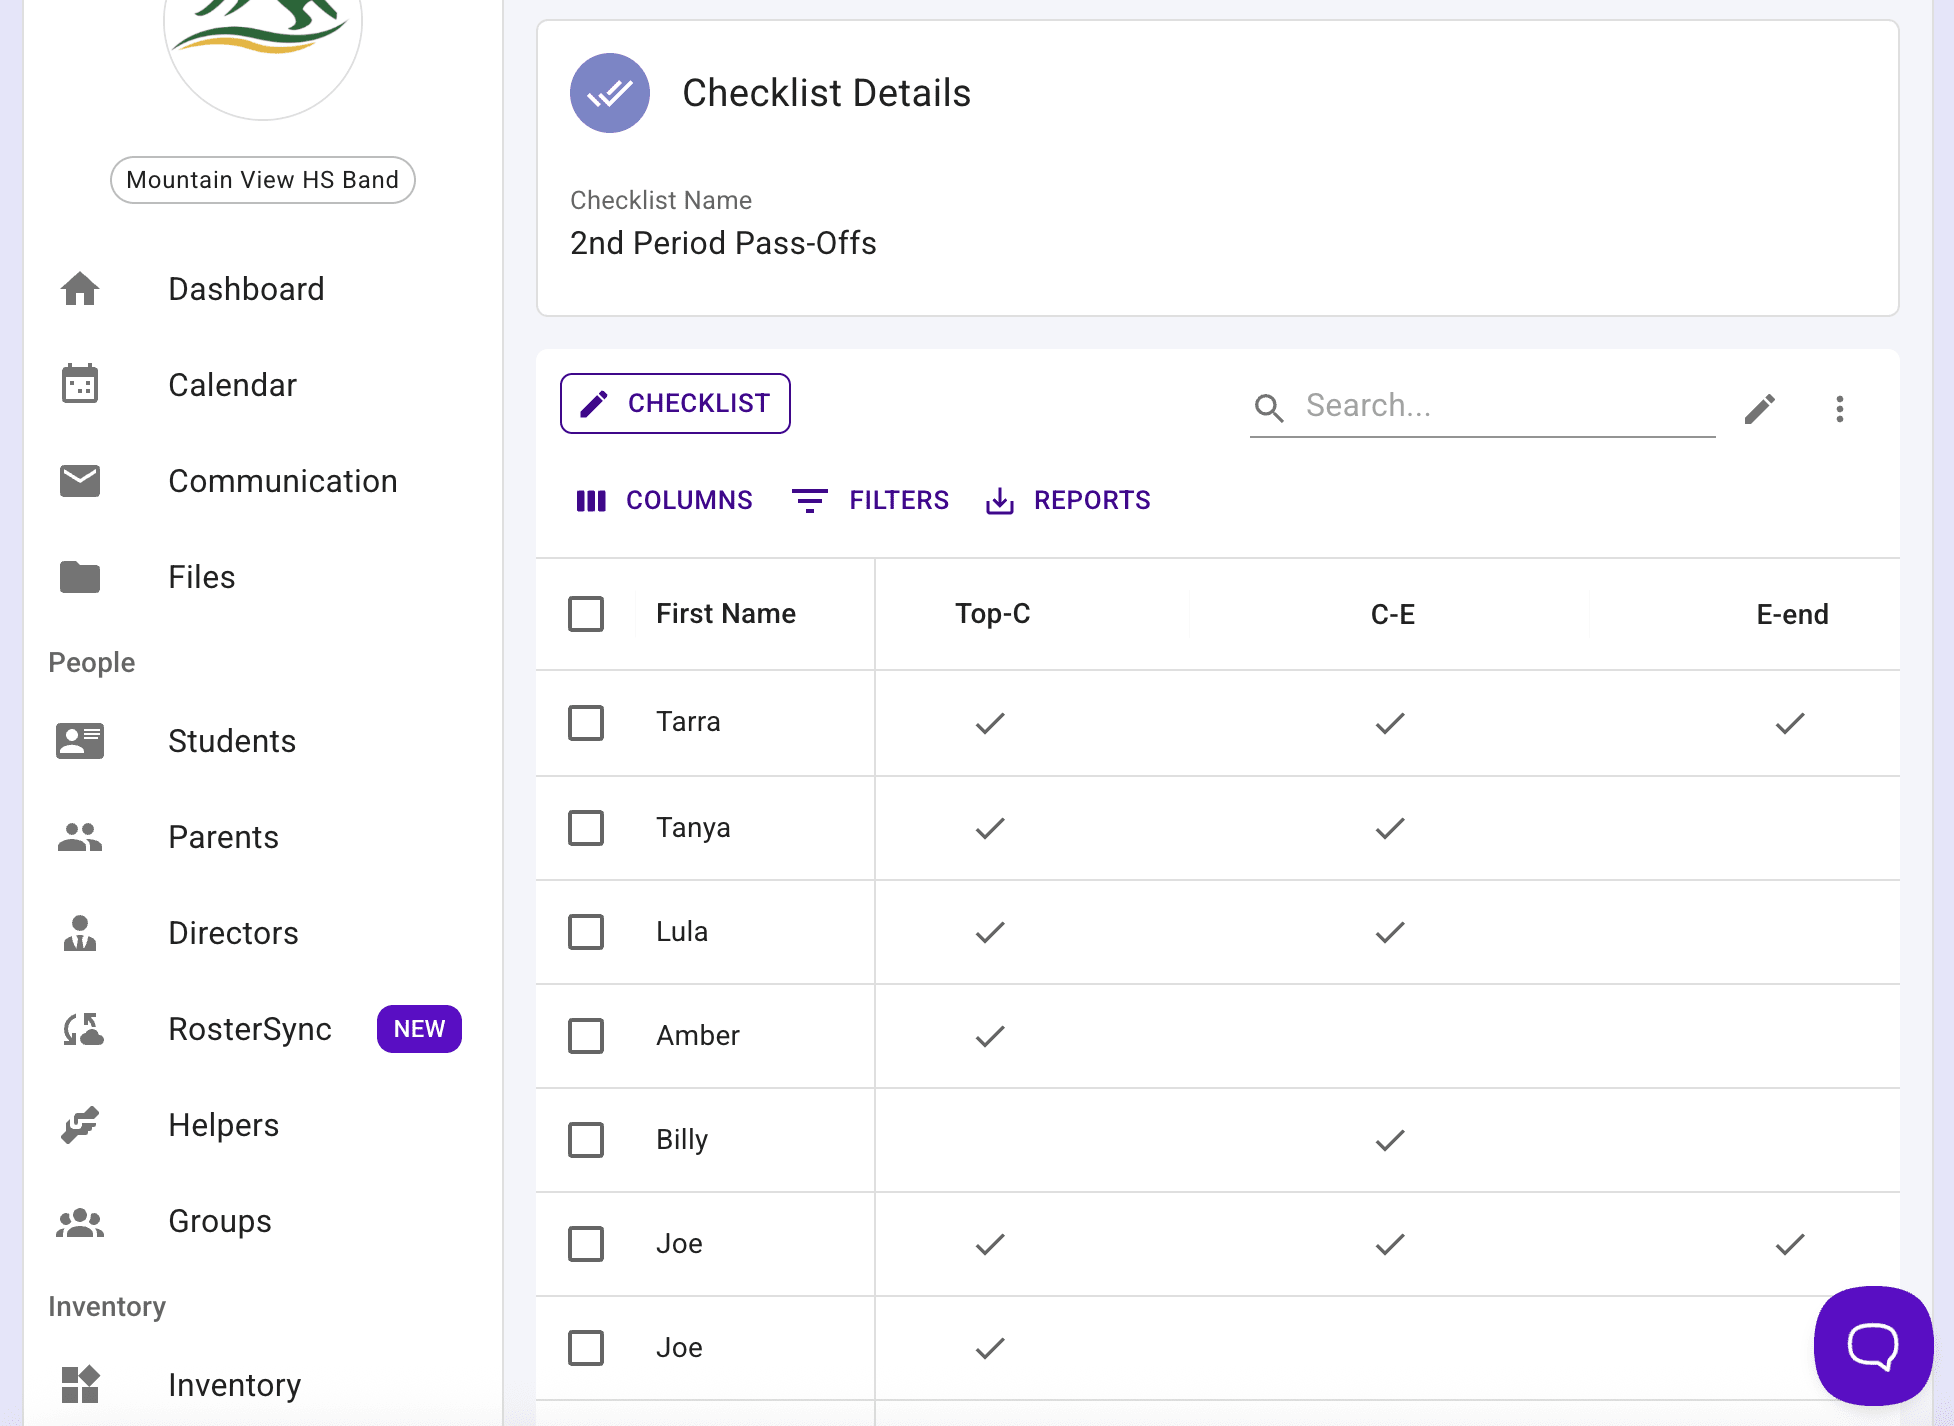
Check the box where a member's row meets an item's column to mark that item done for them, and a check mark appears in the cell. Only directors and other staff see checklists and check these boxes — members never mark their own items off, so the table always reflects what your team has confirmed.
Tip
Required items are marked with an asterisk (*) in their column header, so they stand out from the rest of the table.
Press the three dots above the table and choose "Edit Checklist Data" any time you need to change the checklist's name, add or remove members, or add, edit, or delete items.
Send Emails to Members Based on Checklist Completion #
Because the table knows who has finished what, you can narrow it down to the members you want to reach and email exactly those people — everyone who hasn't passed off their scales, everyone still waiting on a locker assignment, or everyone who's finished so you can tell them they're done.
Email members you pick by hand #
Check the box at the left of each member's row you want to email.
Press the three dots above the table and choose "Email selected". The number beside it tells you how many members you've picked — the option stays greyed out until you've checked at least one row.
Presto opens a new email with those members already filled in as recipients. Write your message and send it.
Email members based on a checklist item #
Filtering saves you from checking rows one by one when you want everyone who has — or hasn't — completed a particular item.
Press "Filters" above the table.
Pick the checklist item you care about, then choose whether you want the members who have been checked off for it or the ones who haven't. The table narrows to match.

- Press the three dots and choose "Email filtered". The number beside it is how many members currently match your filter.
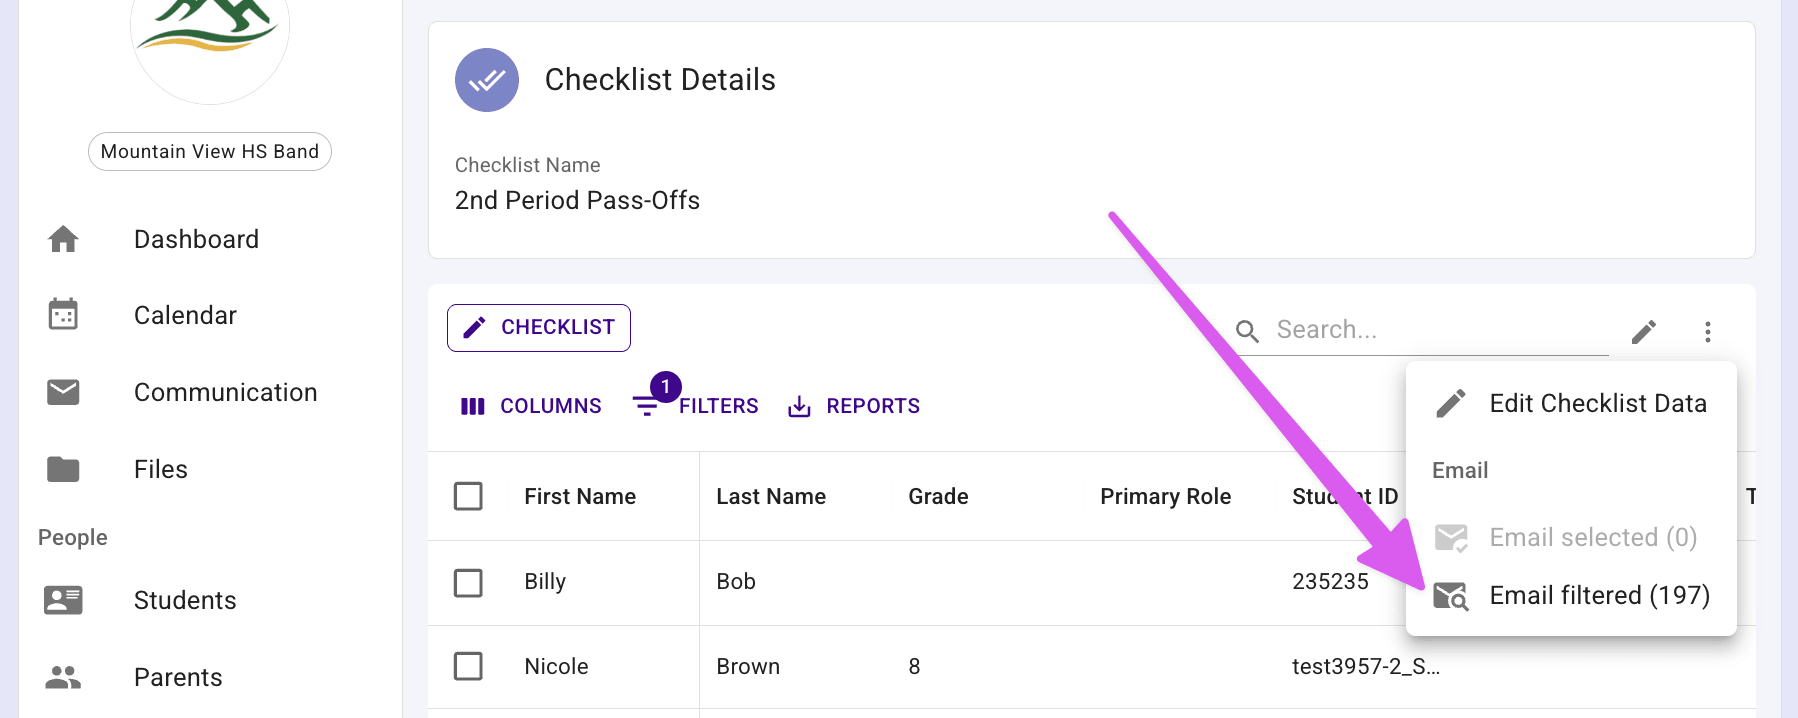
- Presto opens a new email addressed to everyone the filter matched.
Tip
"Email filtered" always follows what's on screen right now, including the "Search…" box. Check the count next to it before you press it — that's exactly who will receive the email.