Who is this for? #
Administrators and Admin Assistants who want to set up a financial item once and roll it out to multiple organizations in their Admin Portal — and Directors who want to understand a financial item that showed up in their organization without them creating it.
What is an Admin Financial Item? #
This is how you standardize a financial item across your whole Admin Portal — a district-wide instrument usage fee, for example — instead of asking every director to recreate the same item themselves. There are three steps, split across two roles:
- You (the Admin) create the item once, at the Admin Portal level.
- You assign it to whichever organizations should have it. This makes the item available at the organization level — it does not assign the item to any members yet.
- Directors at those organizations assign the item to their own members, the same way they would for any Financial Item they created themselves.
Tip
Admins never assign a financial item directly to a member — that step always belongs to the director. An Admin's job is only to create the item and make it available to the right organizations.
Create a Financial Item #
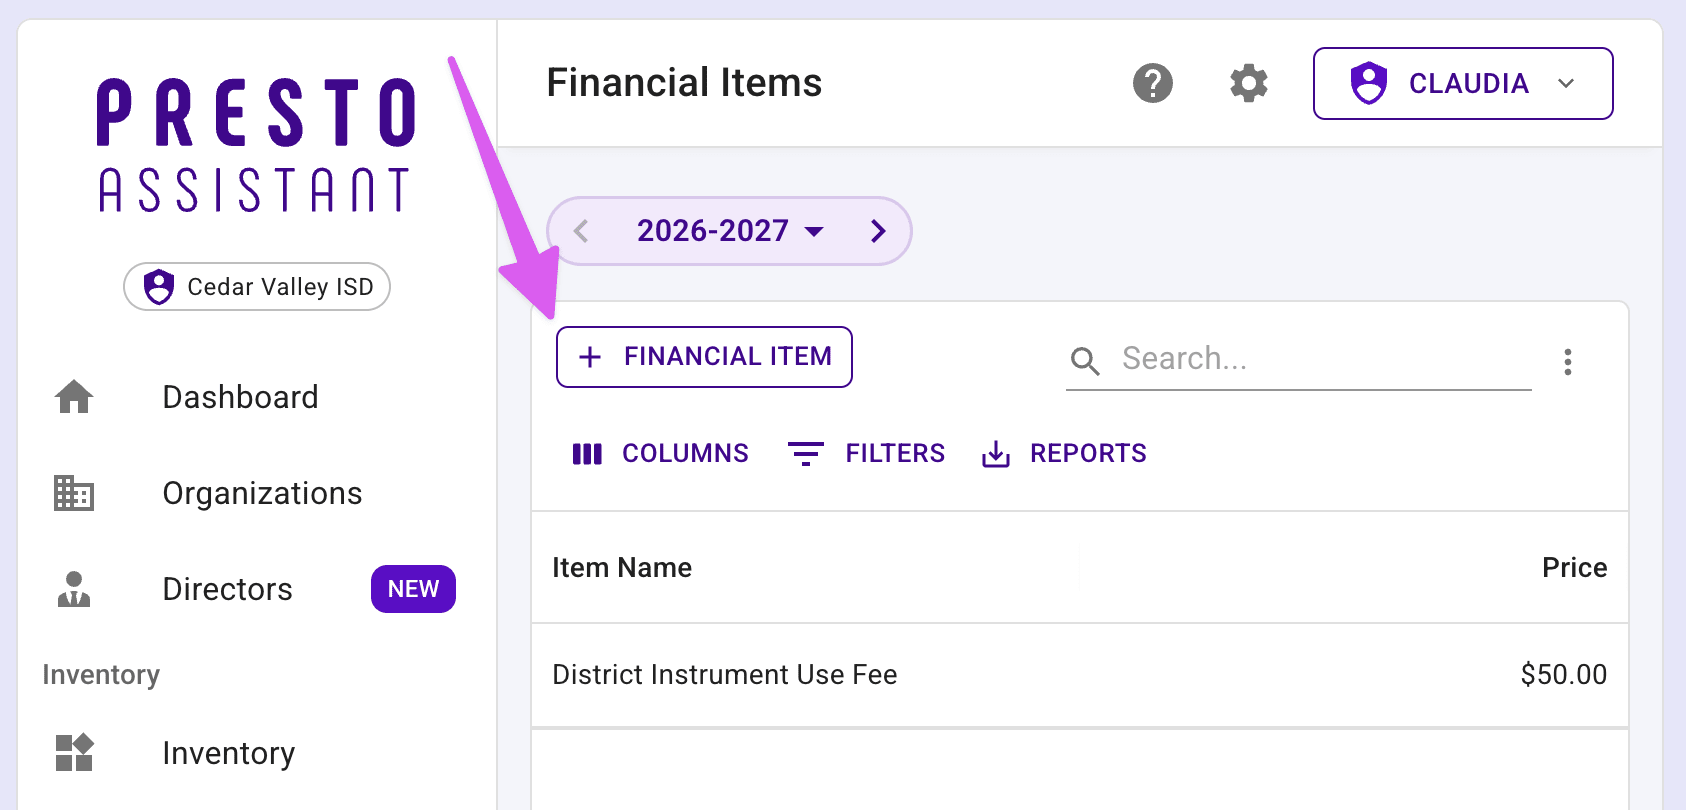
From the left navigation menu, go to "Finances" then "Items".
Press the "+ Financial Item" button to add a new one.
- Fill out the form:
- "Item Name" and "Price" (required)
- "School Year" — the school year the item applies to (required)
- "Active" — checked by default; this only controls the "Active"/"Inactive" status shown on the item, it doesn't currently prevent you from assigning an inactive item to an organization
- "Cover Processing Fee" — leave this unchecked if you want the parent to pay the online processing fee instead of the organization
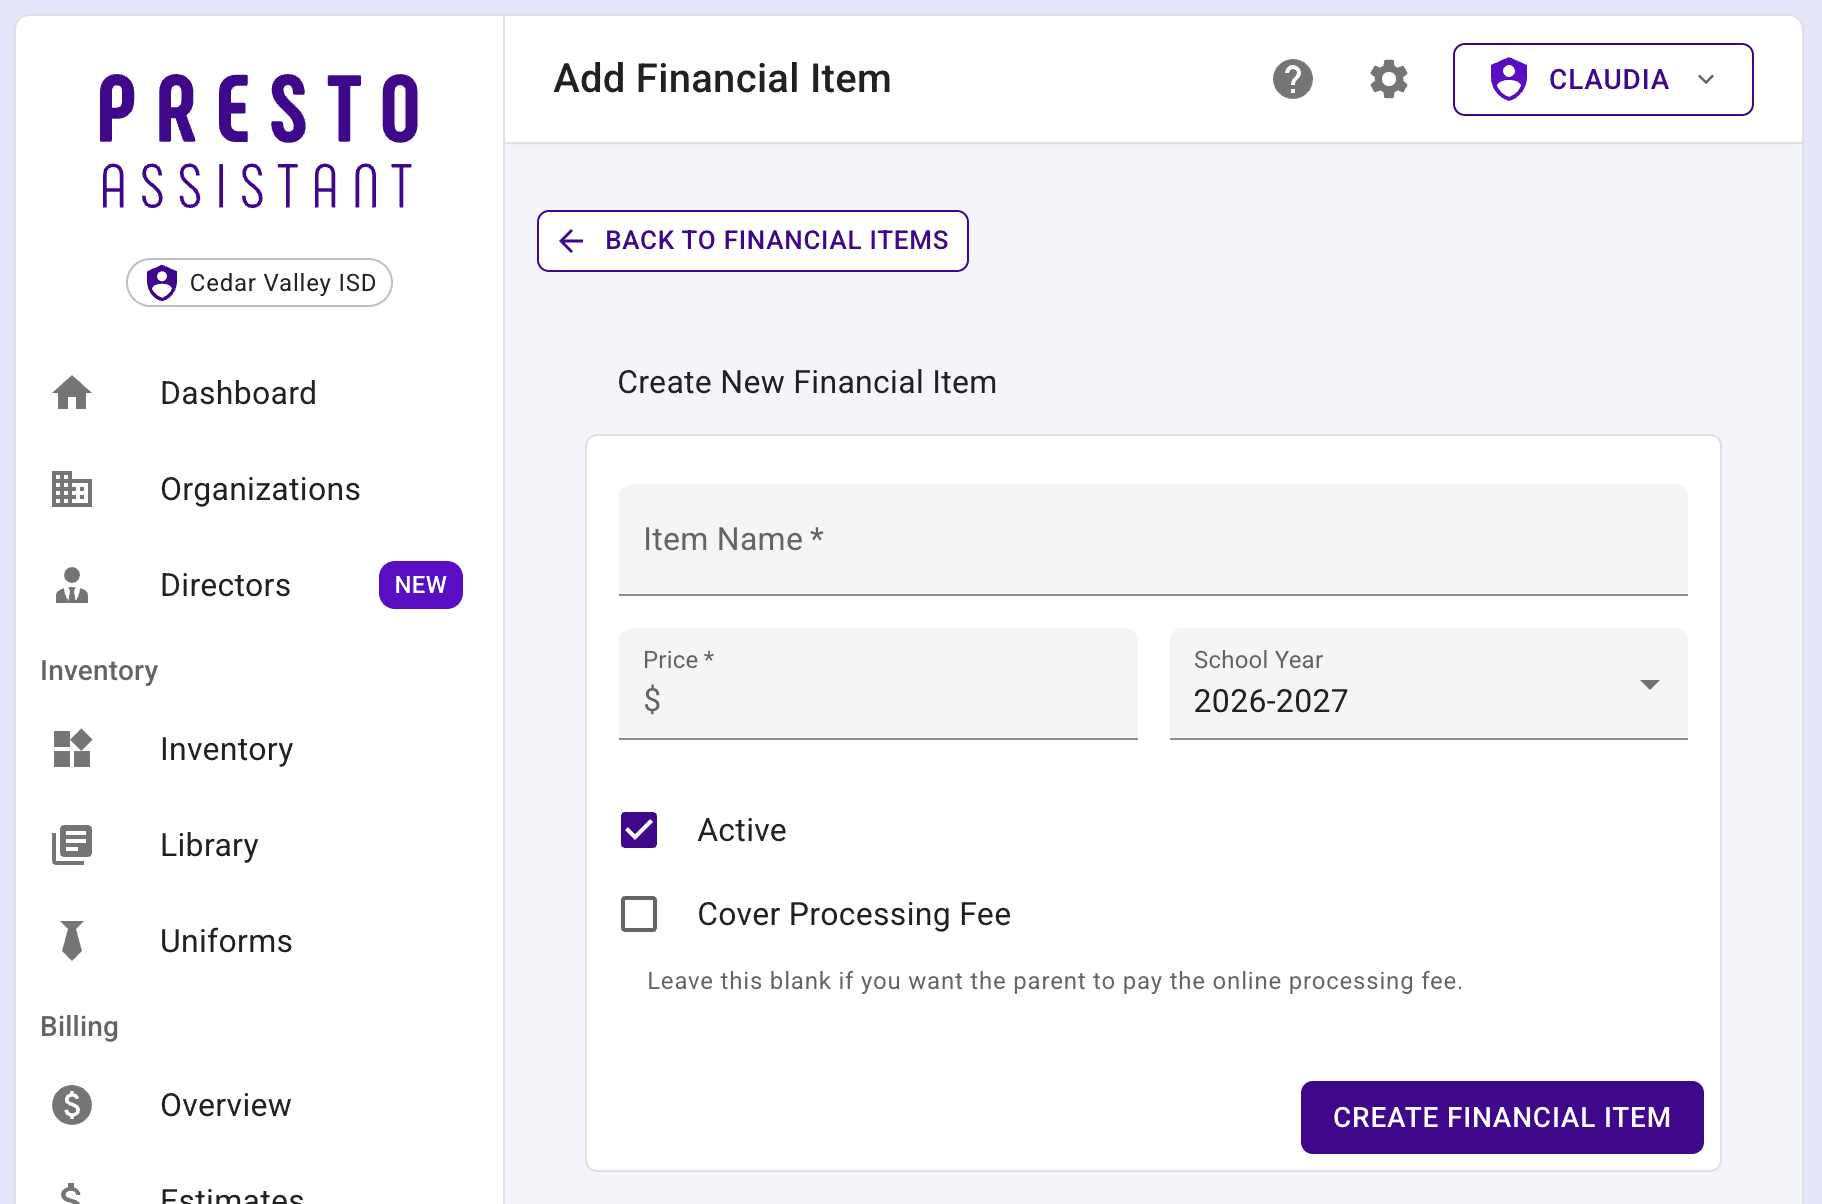
- Press "Create Financial Item" to finish.
Tip
By default, a new item is eligible for every campus type and organization type in your Admin Portal. There's currently no way to edit a financial item after it's created, so double check the name and price before saving.
Assign It to an Organization #
Creating the item doesn't put it in front of any director yet — you still need to assign it to each organization that should have it. Once you press "Create Financial Item", you land right on that item's page — scroll down a bit to find the "Organizations" table.
- In the Organizations table, every organization in your Admin Portal is listed, with a green checkmark for any that already have this item.
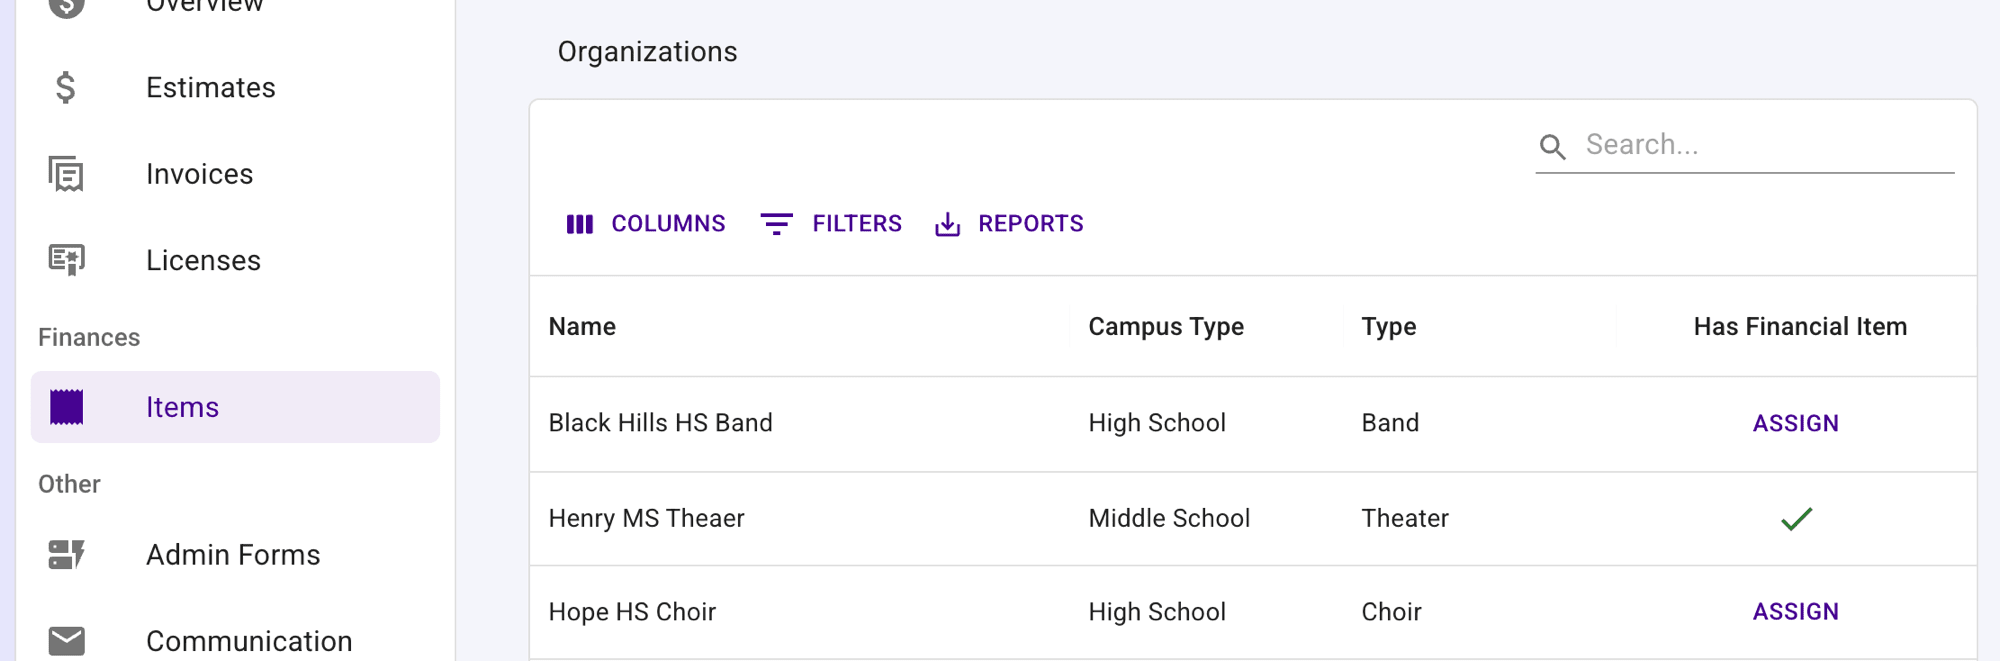
For an organization that doesn't have it yet, press "Assign".
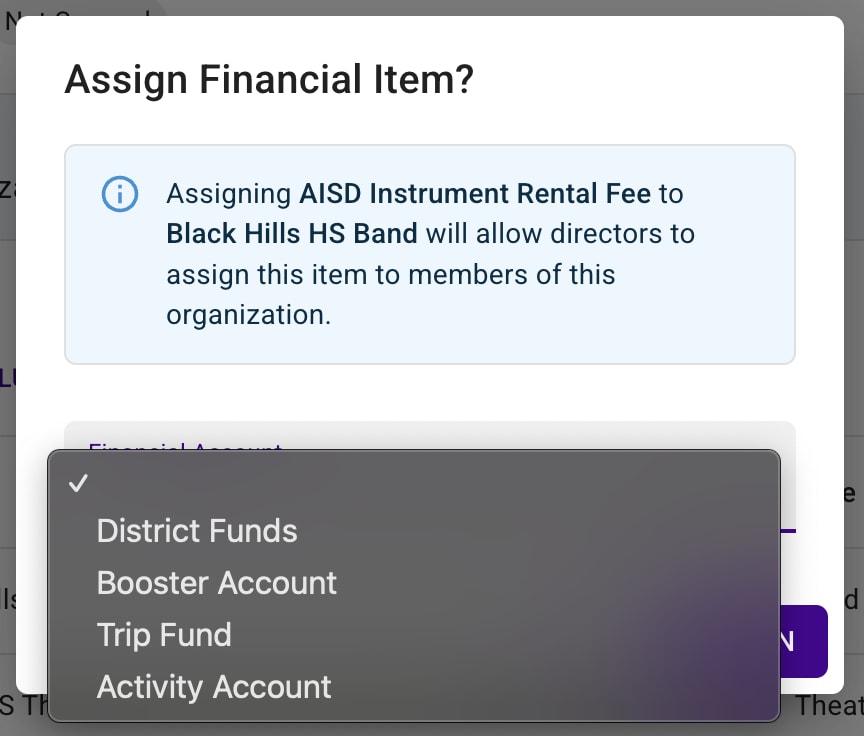
Choose one of that organization's existing Financial Accounts and press "Assign" to confirm.
Tip
If the dropdown is empty, that organization doesn't have a Financial Account yet — a director needs to add one first, following this article, before you can assign the item to them.
What Directors See #
When an Admin assigns a financial item to your organization, it shows up automatically in your own Finances → Items table — behaving like any other Financial Item you created yourself. You still need to assign it to members yourself.
If you notice a new Financial Item nobody on your team created, that's almost always this — reach out to your Admin Portal administrator with any questions.
Next steps #
- Assign the new Admin Financial Item to members the same way you would for any other organization-level Financial Item.
- If you need it to be available for more organizations, repeat the assignment step for each one from your Admin Portal.