Who is this for? #
Directors and staff members who want to efficiently manage inventory, uniforms, and library items using barcodes. This includes adding barcodes to items, finding items quickly, and checking out items via barcode.
Understanding Barcodes #
When you use a barcode scanner to capture a barcode, the scanner reads the visual barcode and converts it into a series of letters and numbers. These letters and numbers are what get stored in Presto's Custom Barcode field. Think of it as a text code that uniquely identifies your item. This text code can then be scanned again later to quickly find or check out that item.
Presto supports two types of barcodes:
System Barcodes — Generated automatically by Presto when an item is created. System barcodes are read-only and permanently linked to that item. You cannot edit or change a system barcode.
Custom Barcodes — User-definable barcodes that you add to an item. Custom barcodes can be entered manually or imported along with item data. These are the barcodes you typically scan during checkout and search operations.
Adding Custom Barcodes to Items #
You can add a custom barcode to an inventory, uniform, or library item in two ways: manually or via import.
Adding a Barcode Manually #
Navigate to the Inventory, Uniforms, or Library page and set up the table view to show the items you want to barcode. You can:
- Keep the full table visible and work through items as needed
- Use the search field to find a specific item
- Use filters to show only certain categories or types (e.g., a specific instrument)
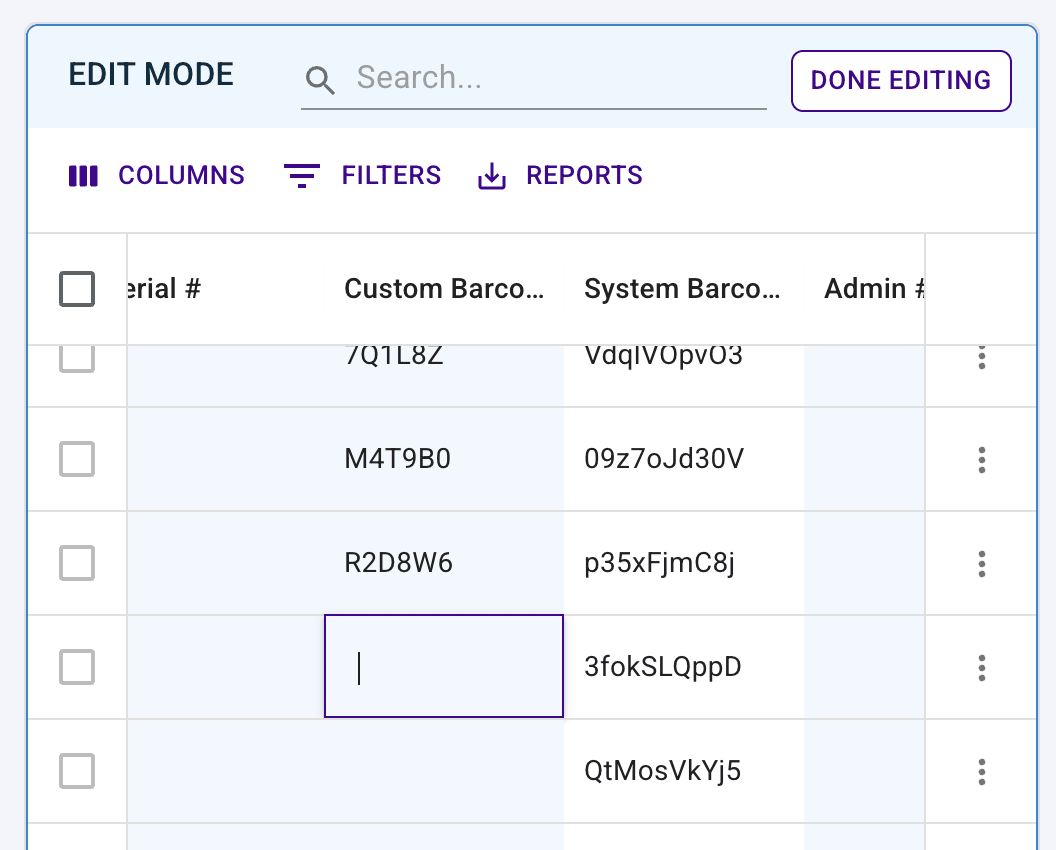
Click the edit button (pencil icon) at the top of the table to enable edit mode.
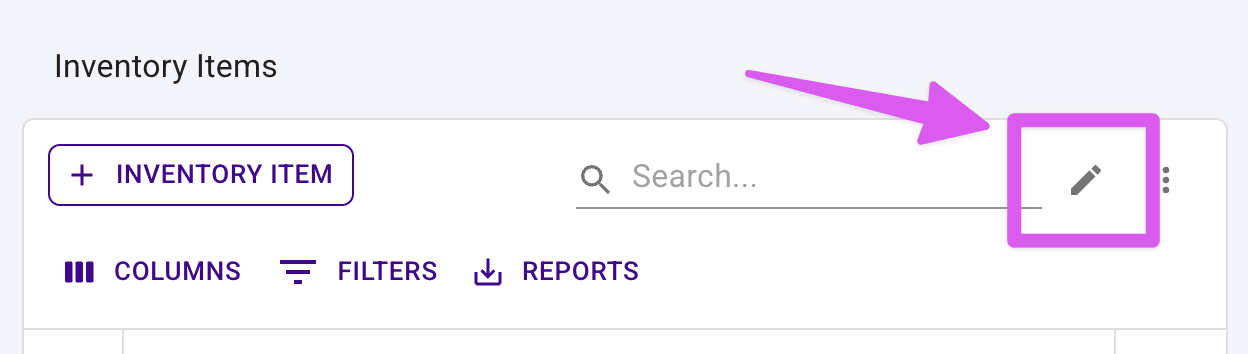
With edit mode enabled, click into the "Custom Barcode" field for any item in the visible table and scan your item's barcode. Presto will automatically capture and save the barcode value.
Move between items in the table, continuing to click into barcode fields and scan. After each scan, press Enter to move to the next item's barcode field and continue scanning.
Adding Barcodes via Import #
You can also add custom barcodes when importing item data. Include the custom barcode values in your CSV file when using the import features for:
- Import New Inventory
- Import Inventory Updates
- Import New Uniforms
- Import New Library Items
For detailed steps on importing items, see the Import Inventory Data article.
Finding Items by Barcode #
One of the fastest ways to locate an item is to use the search bar with a barcode scan.
- Navigate to the Inventory, Uniforms, or Library page and locate the search bar at the top of the table.
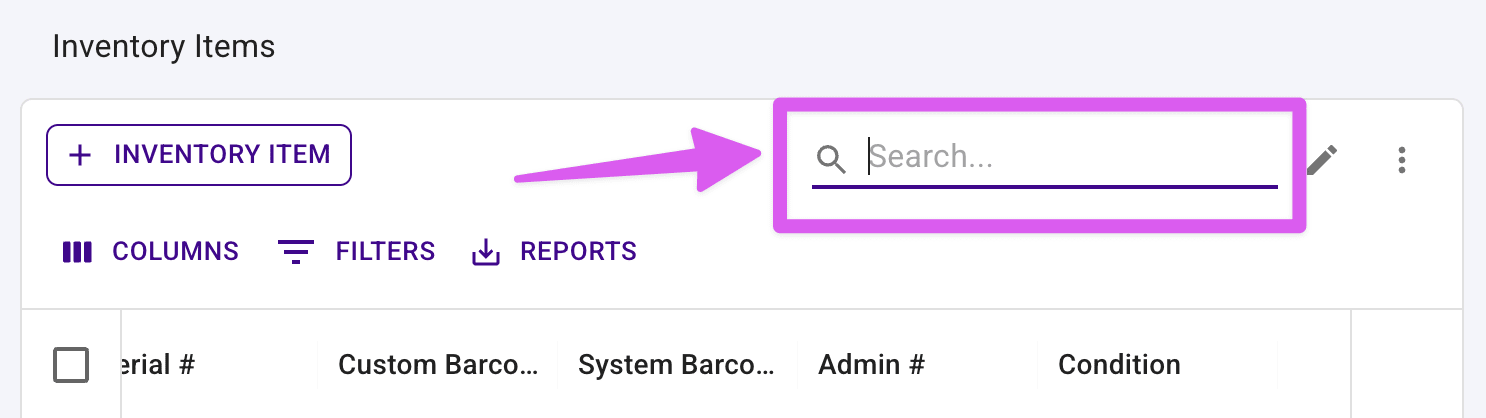
Click into the search bar and scan the item's barcode. The table will immediately filter to show only that item.
From here, you can:
- Click the row actions menu (three dots) at the end of the row to perform quick actions like checking in the item
- Click on the item row to open the full item details page to view all item details, including which students it's currently assigned to
Checking Out Items via Barcode #
You can quickly check out inventory or uniform items to a student by using the barcode checkout flow.
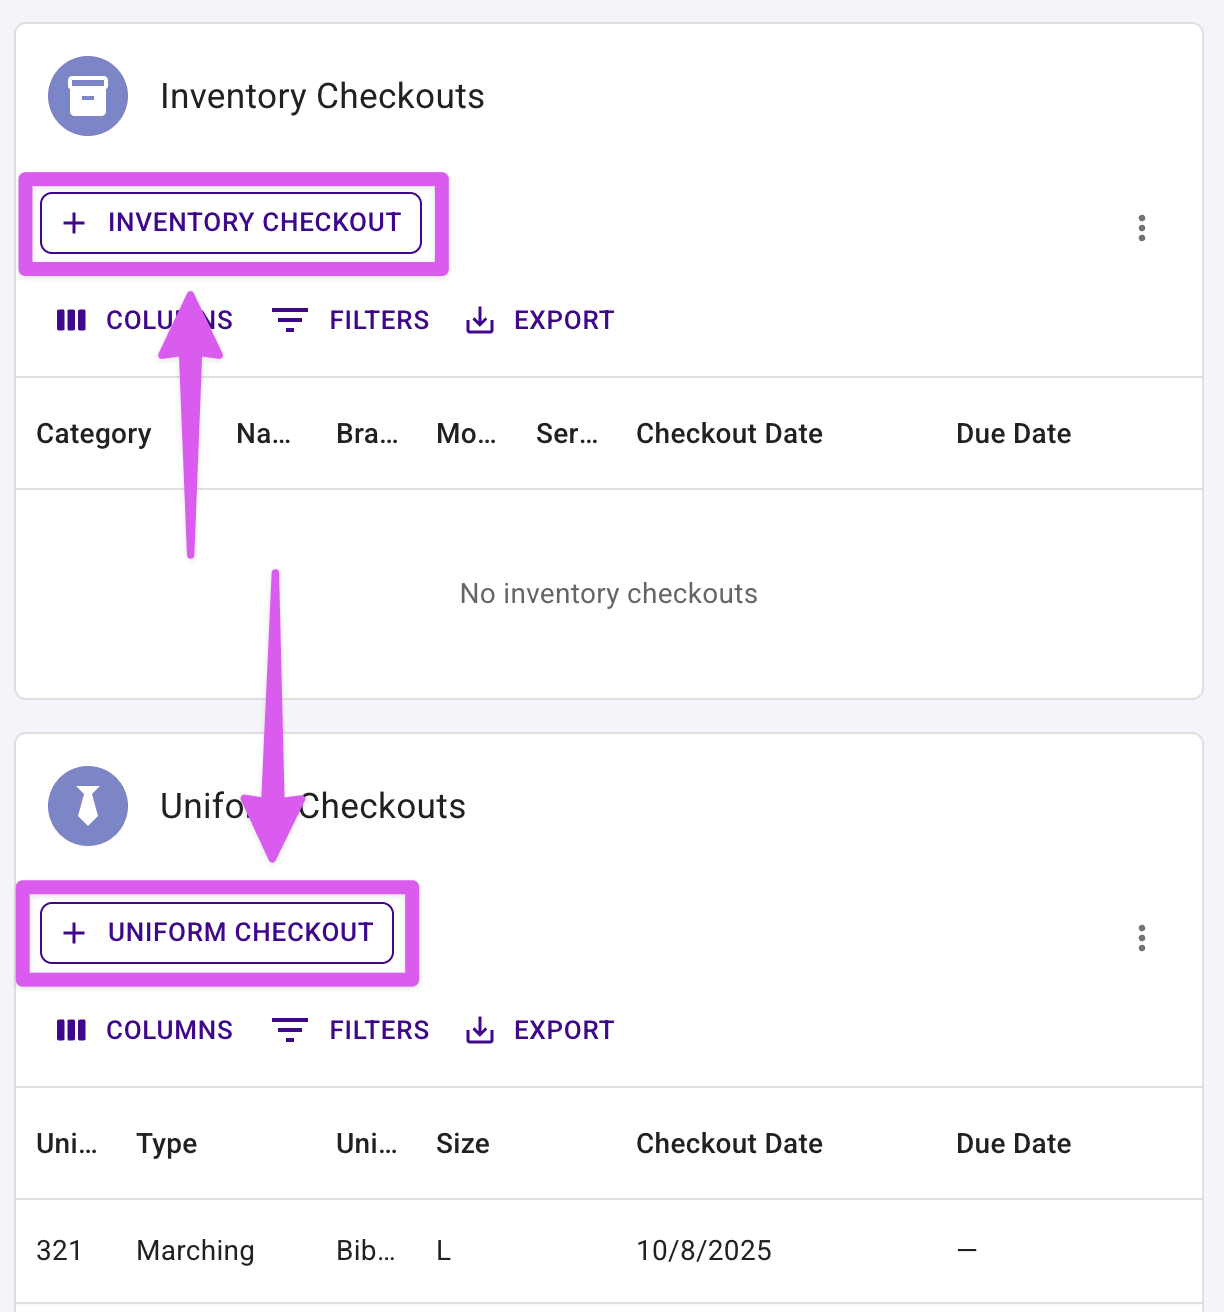
- Navigate to a student's detail page and click the "Check Out" button for the item type (Inventory, Uniforms, or Library).
- You'll be taken to a barcode scanning page. This page is ready to receive barcode scans immediately.
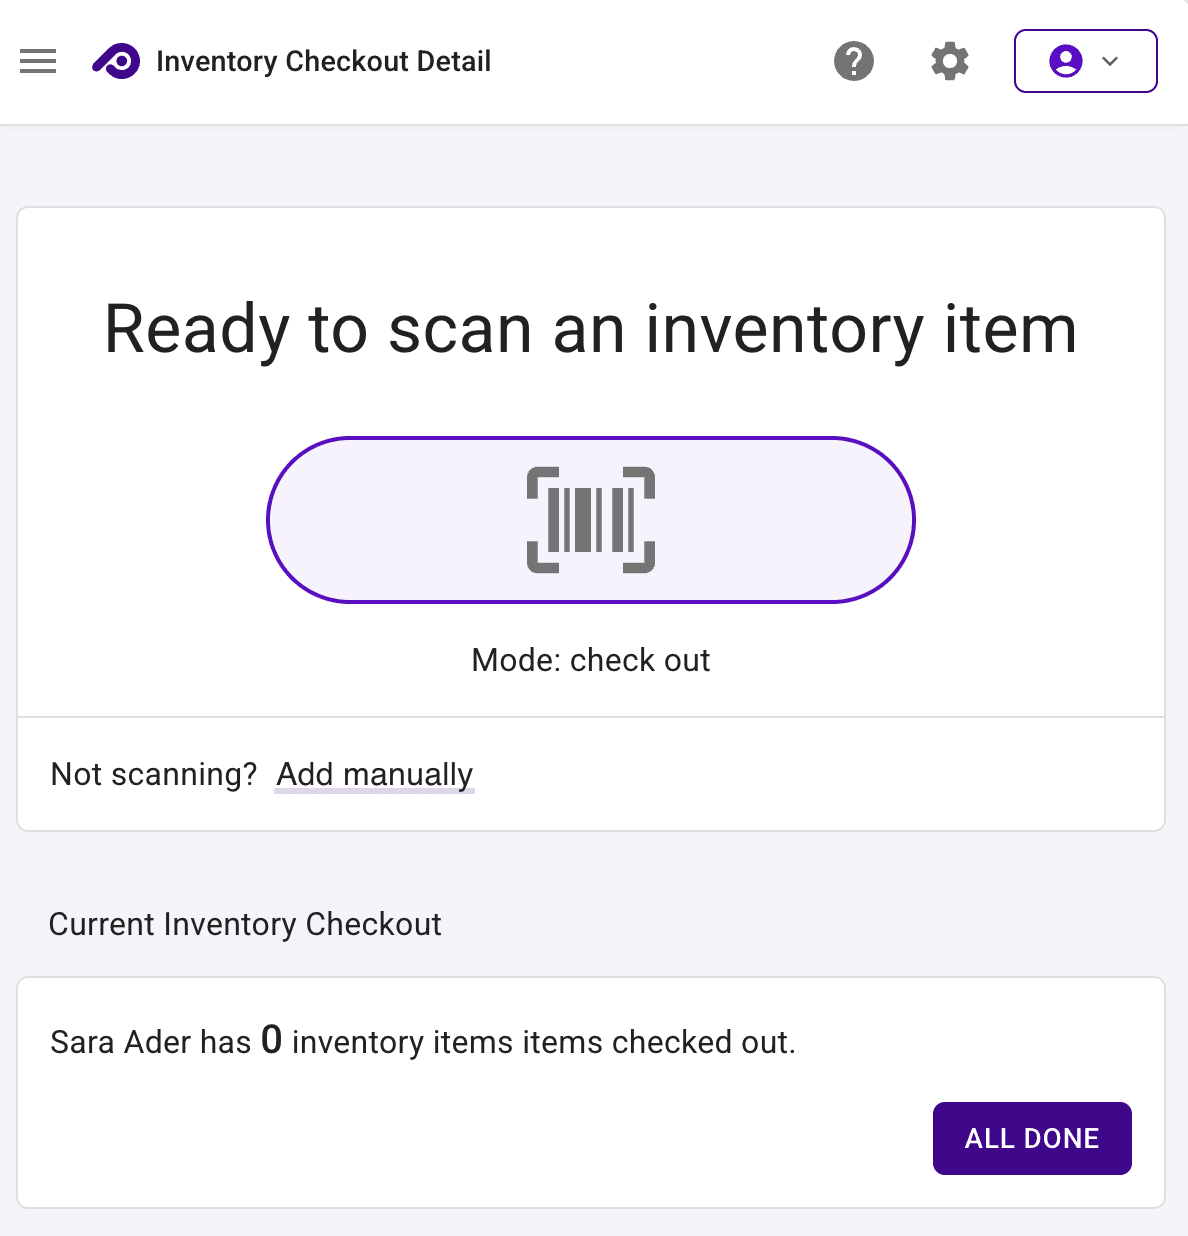
Scan the item's barcode. Presto will match the barcode to the item and check it out to the student.
Repeat for additional items, or navigate back to the student list when finished checking out items.
Checking In Items #
When a student returns an item, you can quickly check it in using the barcode.
On the Inventory, Uniforms, or Library page, click into the search bar and scan the item's barcode to locate it.
The table will filter to show the item. Click the row actions menu (three dots) at the end of the row.
Select "Check In" from the menu. You'll see a confirmation dialog showing which student currently has the item checked out.

Auto-Generating Barcode Data #
Administrators can configure Presto to automatically generate serialized alphanumeric barcode values for new items. This saves time by eliminating the need to manually enter barcode sequences for each item. To convert these alphanumeric values into actual scannable barcode graphics (labels you can print), you'll use a third-party service as described in the Hardware Setup section.
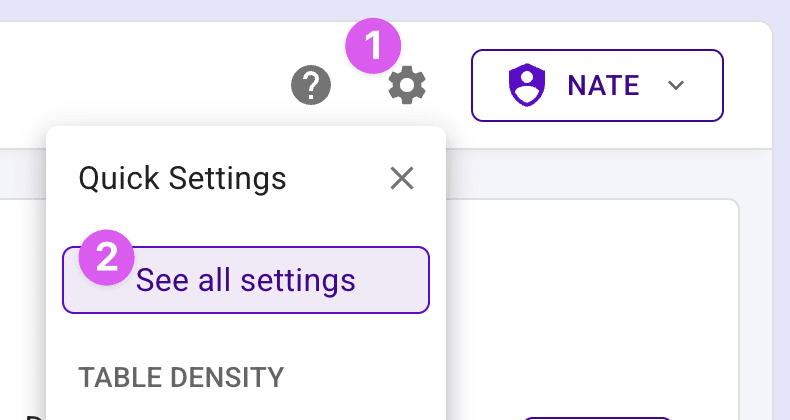
- Click the settings gear icon at the top right of the page and select "See all settings".
- Find the "Admin Portal Setup" section and click the View button. You'll now be in Admin Portal Settings where you can locate the "Minimum barcode value" field under "Inventory Settings".
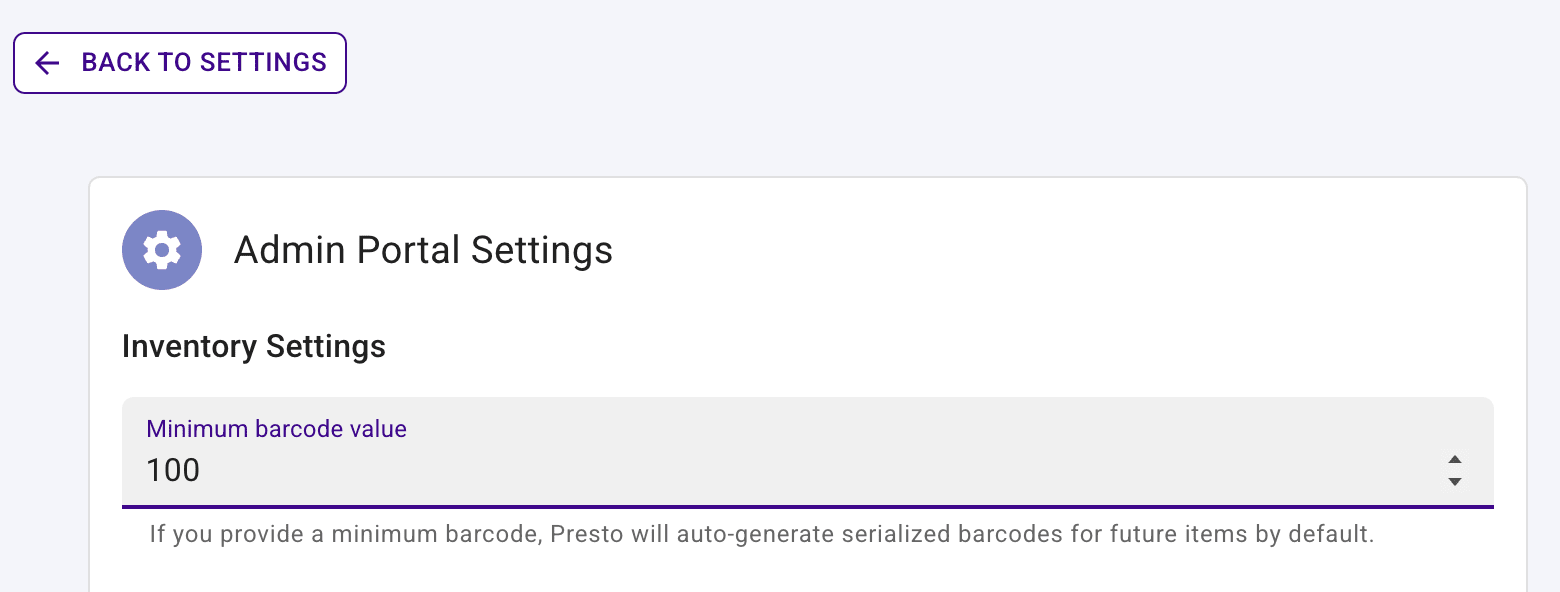
Enter a starting number for your barcode sequence (e.g., 1000, 10000, etc.).
Click save. From this point forward, Presto will automatically generate serialized barcode values for any new items created in your inventory. Each new item will receive the next number in the sequence.
Hardware Setup #
To use barcode scanning in Presto, you'll need a barcode scanner. Most standard USB or Bluetooth barcode scanners are compatible with Presto and work across all devices and operating systems, including Mac, Windows, and Chromebooks.
When you connect a barcode scanner to your device, it acts like a keyboard input device — when you scan a barcode, the scanner outputs the barcode's letters and numbers as if you typed them. This works seamlessly with Presto's barcode fields without any special configuration needed.
Creating Physical Barcodes #
Presto generates the alphanumeric barcode sequences (the text values), but to create actual barcode graphics you can scan, you'll need to use a third-party service. Many organizations use services like Avery.com to convert Presto's barcode sequences into printable barcode labels. If you'd like guidance on this process, contact our support team — we have a walkthrough video available for customers interested in setting this up.
Smartphone Camera Scanning #
Currently, scanning barcodes in Presto requires a hardware barcode scanner. We know smartphone camera scanning is a feature our users want, and it's on our roadmap.