Who is this for? #
Administrators and Admin Assistants who want to create a form once and automatically send it to members across matching organizations in their Admin Portal — and Directors who want to understand a form that showed up in their organization without them creating it.
What is an Admin Form? #
An Admin Form works like any other Form (see Add a Form as a Director), but instead of building it inside one organization, you create it once at the Admin Portal level. When you publish it, it automatically goes out to every organization that matches the campus type, organization type, and member types you chose — there's no separate step to assign it org by org.
Tip
Setting up an inventory checkout agreement? That's a special kind of Admin Form with its own dedicated flow — see Add an Inventory Checkout Form instead. This article covers standard Admin Forms.
Create a Form #
From the left navigation menu, press "Admin Forms".
Press the "+ Form" button.
Enter a "Title" and choose a school year.
Under "Assign To", choose which Campus Types, Organization Types, and Member Types (Directors, Parents, Students) should get this form. All options are checked by default.
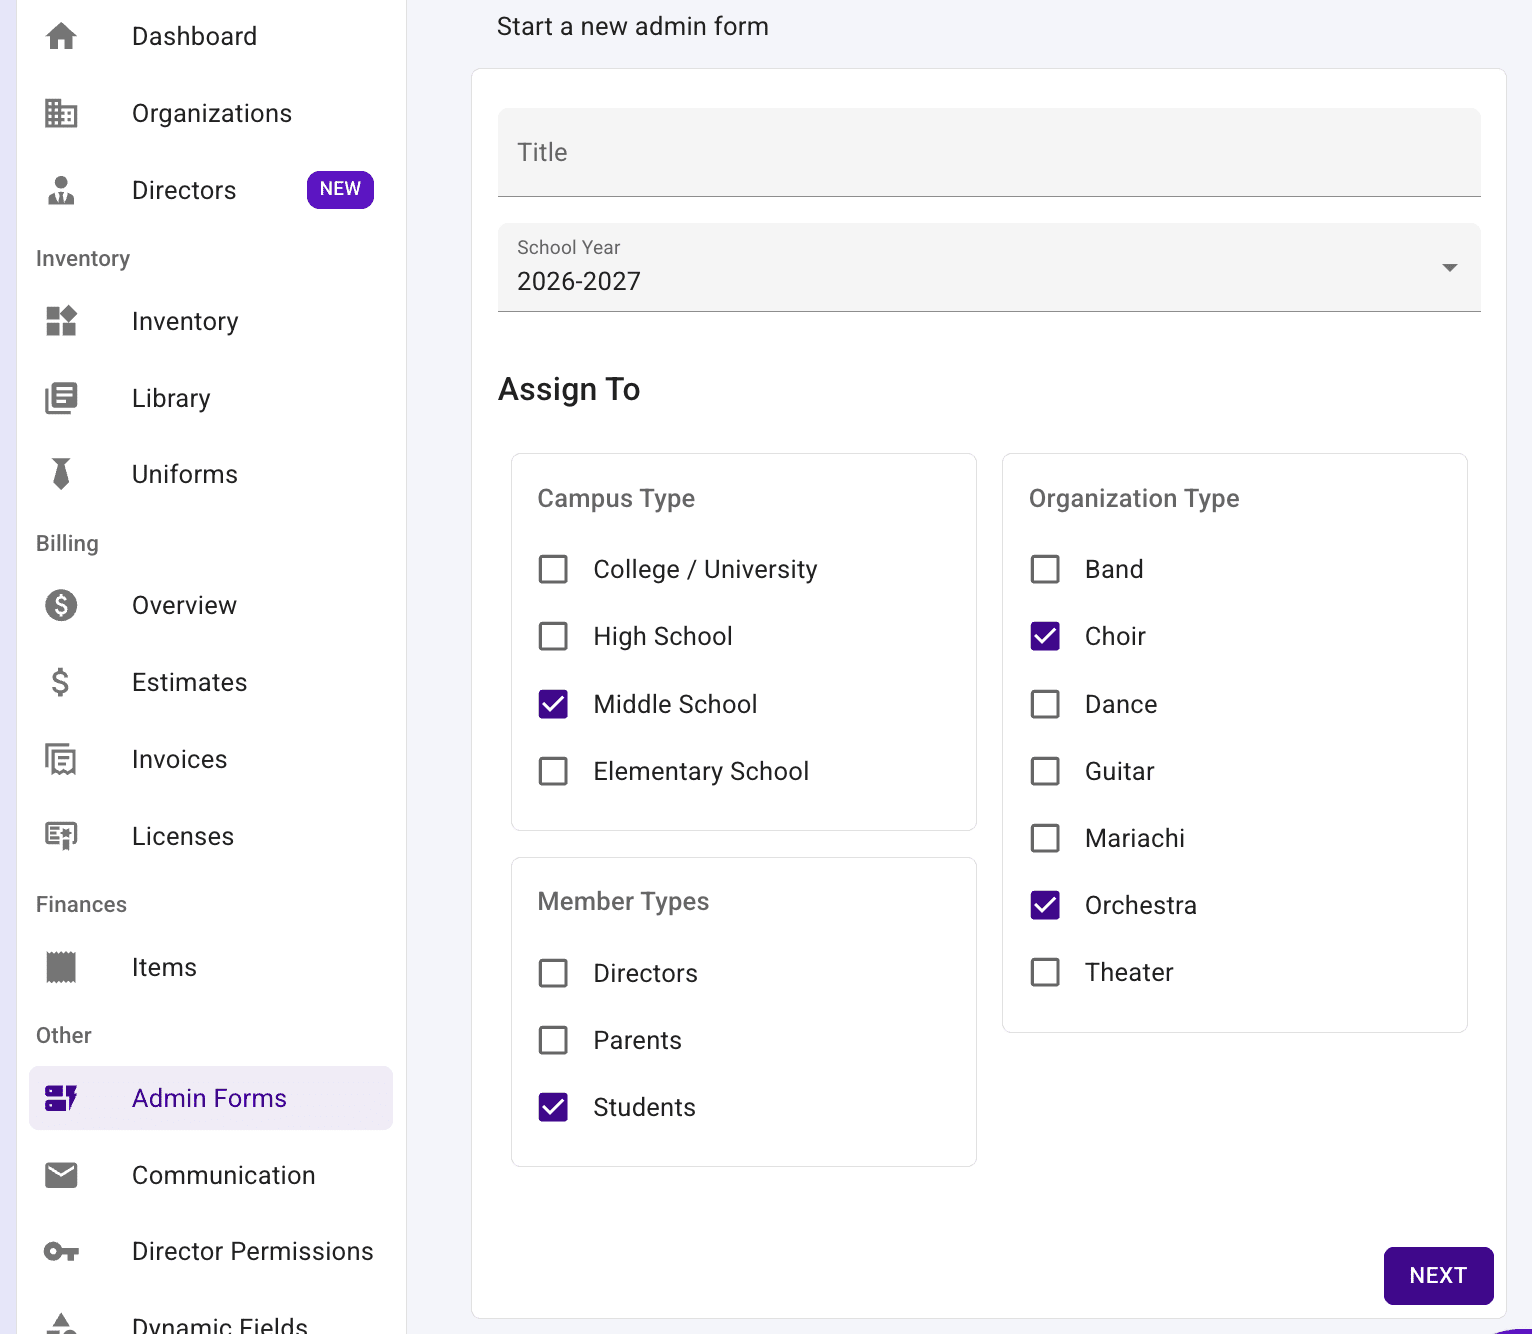
- Press "Next" to save the form and move on to adding its content.
Tip
Only an organization whose campus type and organization type both match what you picked here will ever see this form. Double check these before publishing — you can still change them, but only until you publish.
Add Blocks and Publish #
Add questions and content to your form the same way you would for any other form — see Add Form Blocks for what's available.
When you're ready, press "Publish" and confirm "Yes, Publish" in the dialog that appears.
Tip
You can't add or edit content on a form after it's published, so make sure it's ready first. You'll still be able to change who it's assigned to.
What Directors See #
As soon as you publish a form, it shows up automatically in the Forms table for every matching organization, marked "Admin Form." Directors don't have to do anything to receive it, and there's no notification to send.
Since it's managed at the Admin Portal level, directors can't unpublish or delete it. They can still duplicate it to make their own independent copy if they want to adapt it for their organization.
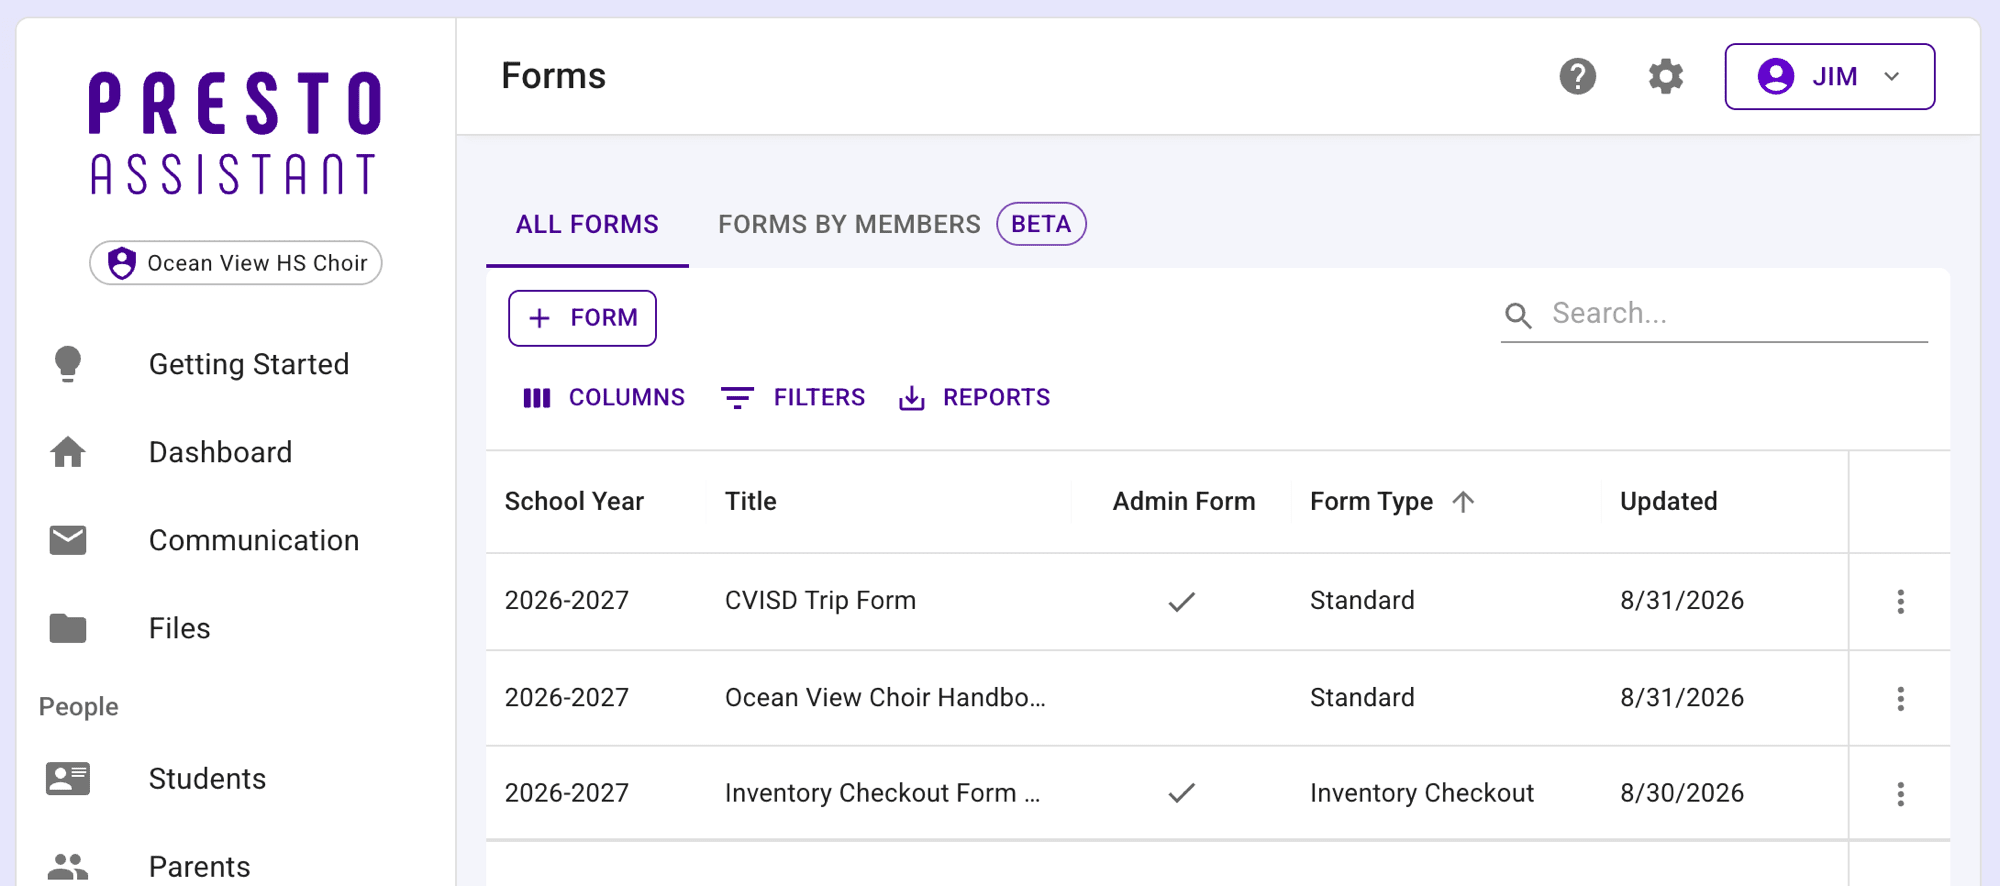
This table shows all three kinds of forms a director might see:
- "Ocean View Choir Handbook" — created by the director in their own organization. No checkmark in the "Admin Form" column.
- "CVISD Trip Form" — a standard Admin Form, published from the Admin Portal.
- "Inventory Checkout Form" — the Admin Portal's Inventory Checkout Form.
The last two are both marked with a checkmark in the "Admin Form" column, since both came from the Admin Portal.
Manage Existing Admin Forms #
From the Admin Forms table, open a row's actions menu to:
- Duplicate — make a copy to start a new form from.
- Unpublish — unassign the form and delete all its responses. Directors lose access to it right away.
- Delete — remove the form and its responses entirely.
Next steps #
- Responses to an Admin Form aren't collected at the Admin Portal level — each organization sees and manages its own members' responses from its own Forms page, the same as for any other form.
- If you need a checkout agreement for inventory instead, see Add an Inventory Checkout Form.