Who is this for? #
A Presto Director who already imported or added student and parent data and wants to allow those members to sign in.
Why is this needed? #
If you have added or imported student and parent data into Presto Assistant, you'll need to invite the members to finish setting up their profile. Until they receive the Welcome Email, parents and students will not be able to sign in to your organization.
There are three ways to send the Welcome Email, depending on how many members you need to reach:
- All members — good for sending to everyone who hasn't signed in yet.
- One member — good for a single student or parent.
- Selected or filtered members — good for sending to any specific set of students or parents as needed.
Send to all members #
- From the Dashboard, click on the Settings menu in the upper right corner and choose "See all settings".

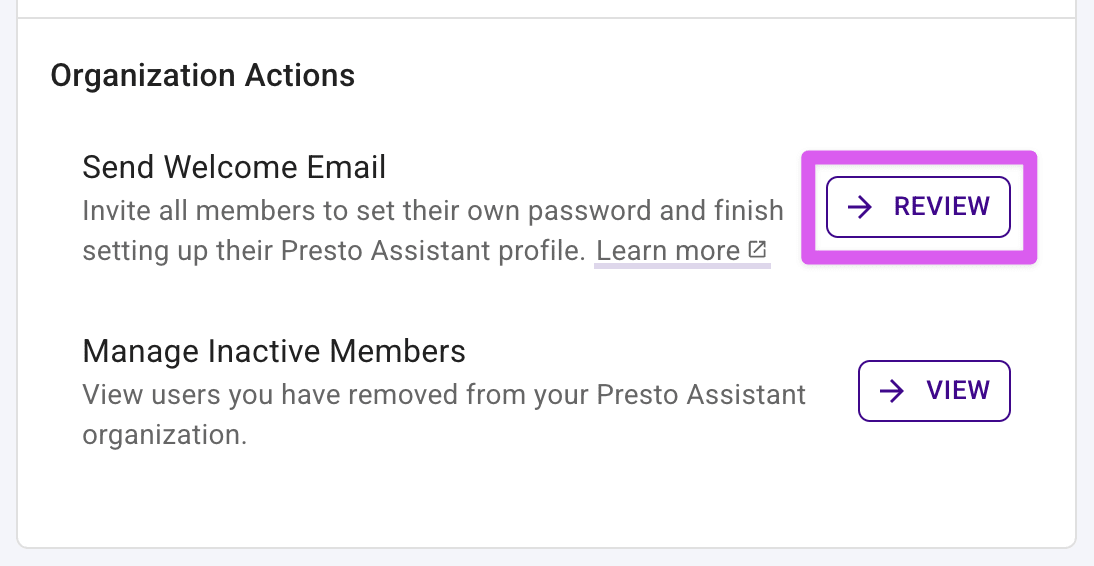
- On the Organization card, find the Organization Actions section. Press the "Review" button. The Welcome Email will go out to any member who meets all of the following criteria:
- Has never logged in.
- Hasn't received the Welcome Email in the last 24 hours.
Tip
When you add new members to your organization later, come back here to send the Welcome Email to all new members at once.
- Confirm that you want to send the email by pressing the purple submit button in the confirmation dialog.

Send to one member #
- Click on a row in the students or parents table to see the details page for that member.

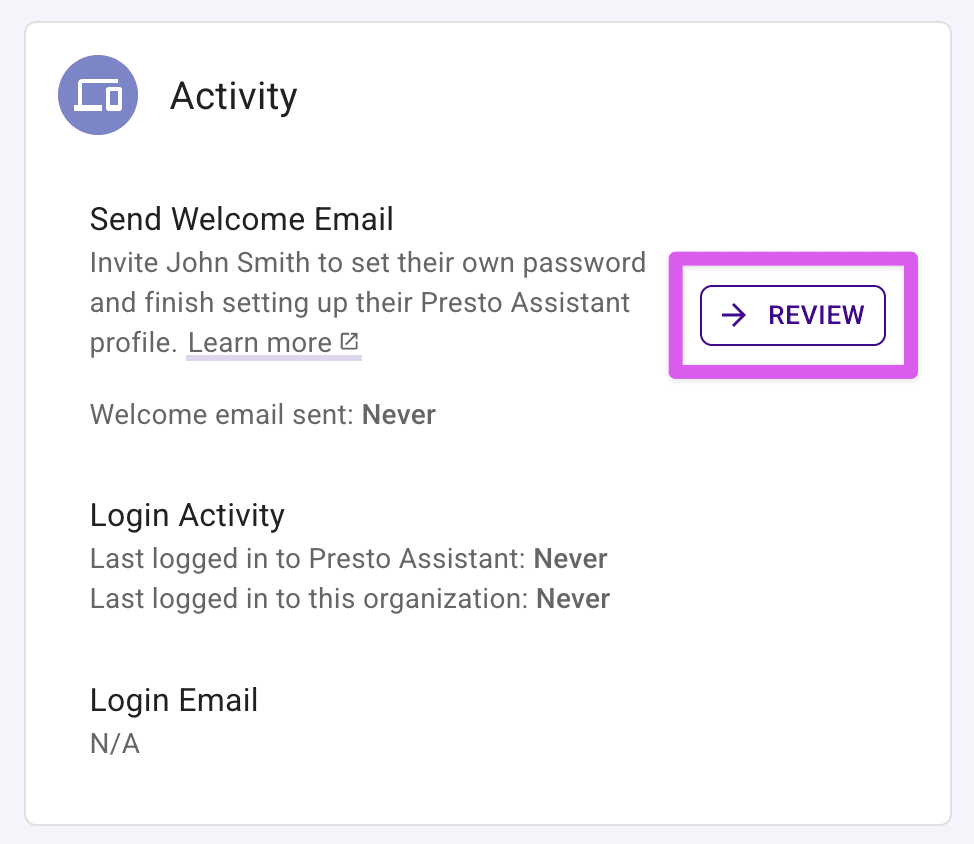
- Scroll to the Activity card. If the member has never signed in, you will see the "Send Welcome Email" section. Press the "Review" button.
Tip
The "Send Welcome Email" section will not show if the member has signed in before. For any member having trouble signing in, please ask them to use the "Forgot Password" link on the login page and provide this support article to them.
- Confirm that you want to send the email by pressing the purple submit button in the confirmation dialog. The Welcome Email will go out to the email on file for this member.

Send to selected or filtered members #
If you need to send the Welcome Email to more than one member but not your whole organization — for example, everyone in a certain grade, group, or instrument — you can select specific rows or filter/search the table first, then send from the table's "More Actions" menu.
From the Students or Parents table, either:
- Check the boxes next to the specific members you want to email, or
- Use the search bar or filters to narrow the table down to the members you want to email.
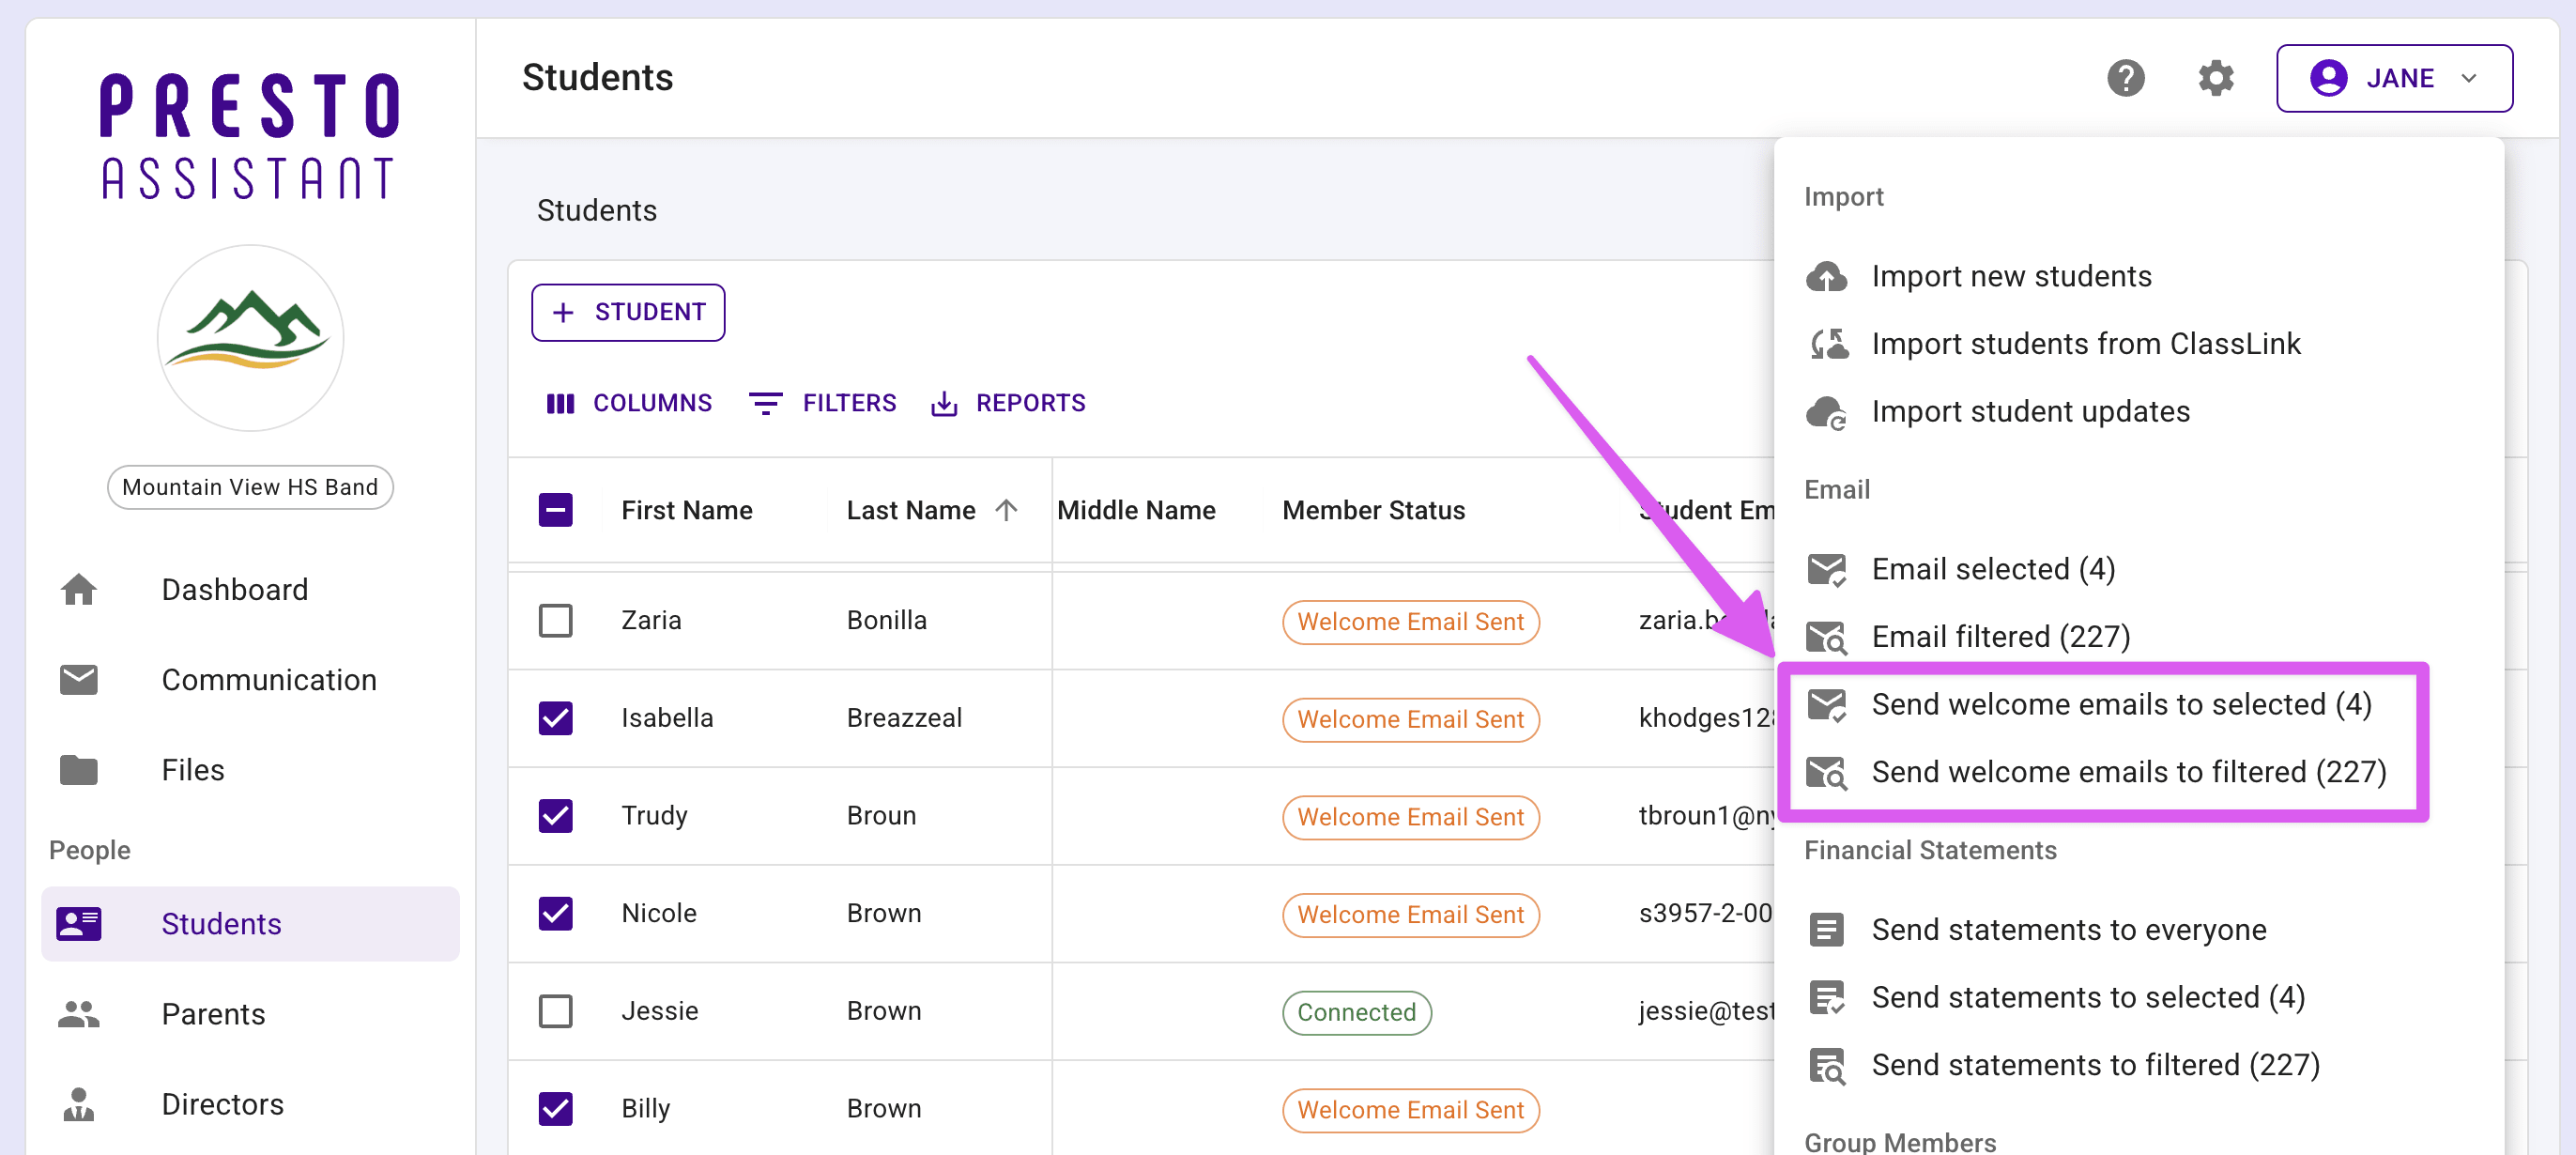
Click the three-dot "More Actions" menu in the table toolbar.
Choose one of the following options:
- Send welcome emails to selected — sends only to the members whose checkboxes you selected.
- Send welcome emails to filtered — sends to every member currently shown by your search or filters, whether or not they're checked.
Tip
Both options are only available to Directors, and the number in parentheses updates live to show exactly how many members will receive the email.
- Confirm that you want to send the emails by pressing the purple submit button in the confirmation dialog.
Tips and Tricks #
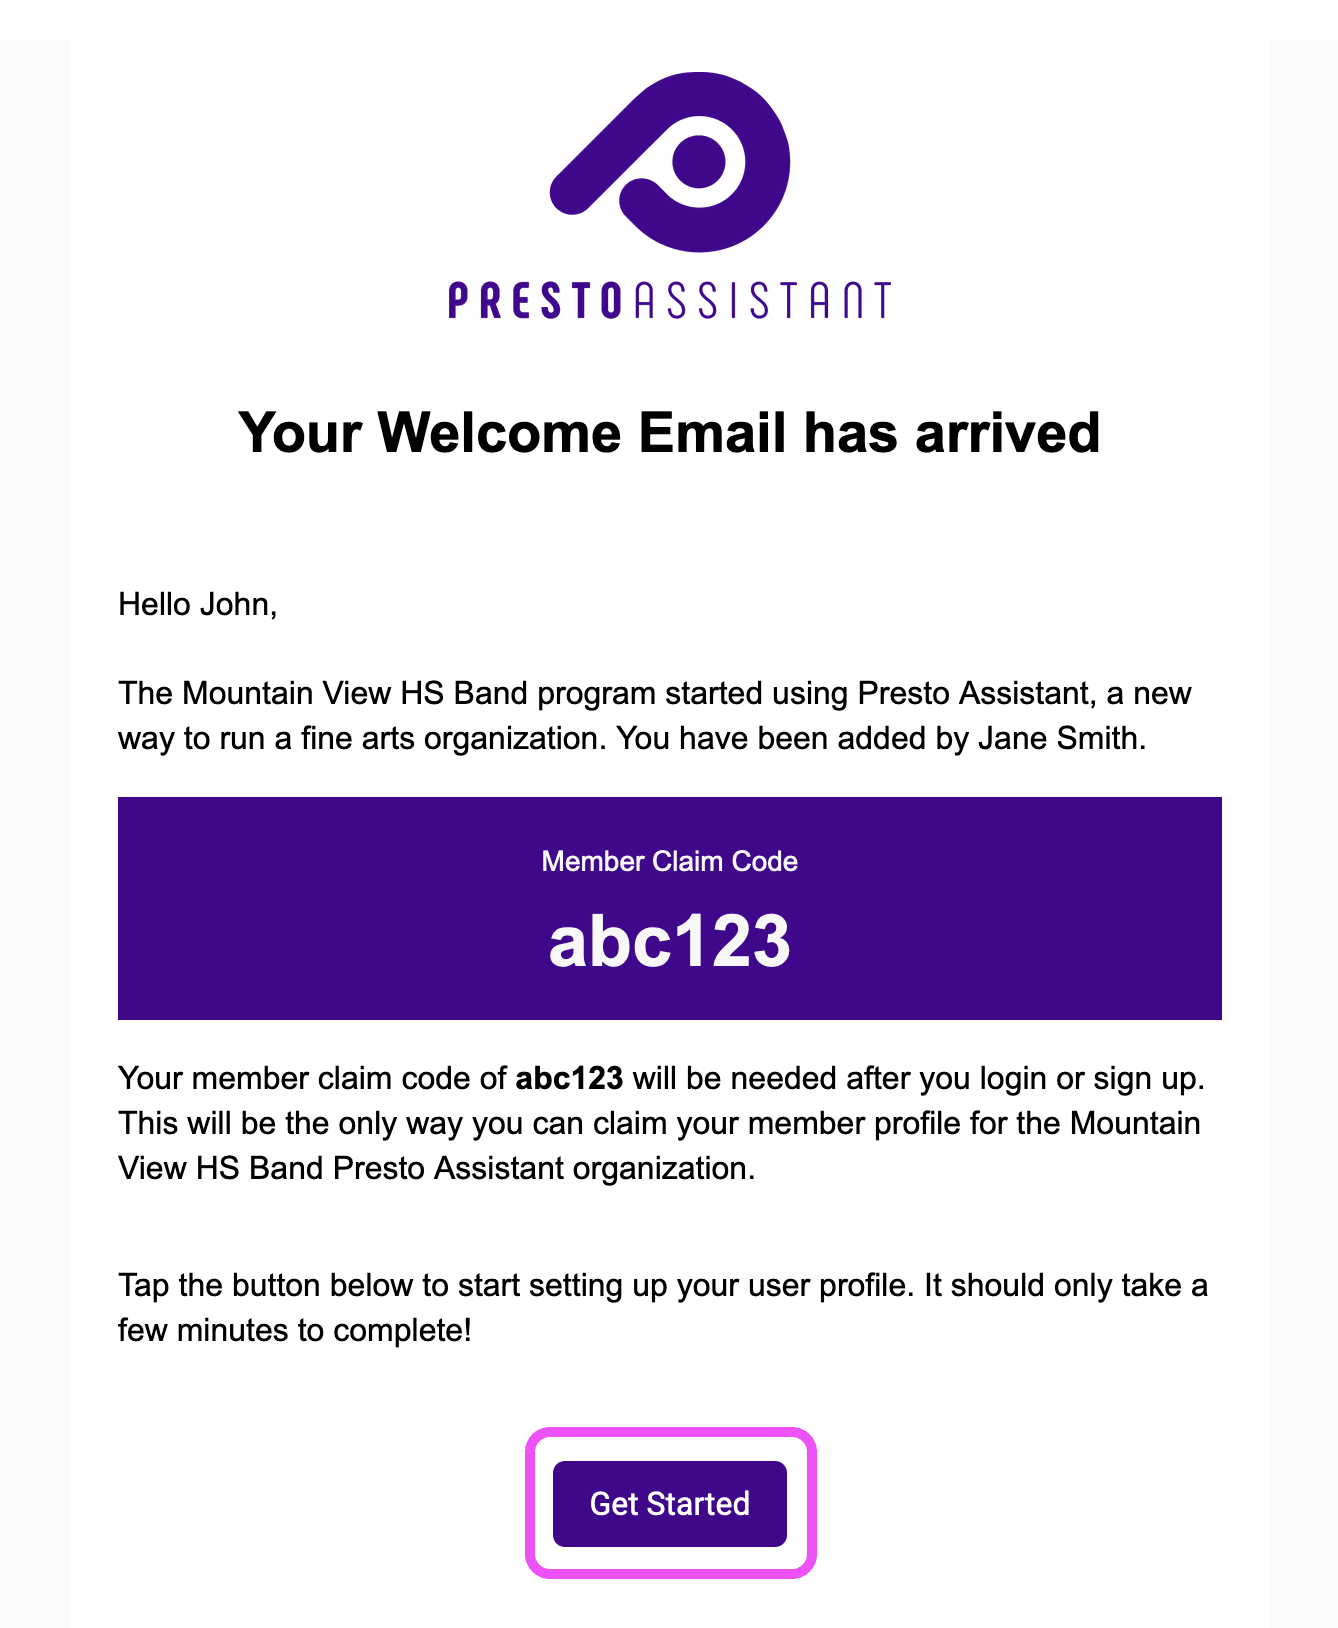
- Tell students and parents to click the "Get Started" link in the Welcome Email and sign up using the same email address the Welcome Email was sent to. This lets them one-click "Claim" their profile during setup — no code needed. If they sign up with a different email, they'll need to enter the Member Claim Code from the Welcome Email instead. They can refer to this support article for help either way.
- If a member sees the "Sad Cat" page, they can click the "Resend Email" button to receive a new verification email at the same email address.
- Students and parents who receive a Welcome Email are already members of your organization — they should use the "Get Started" link in the email rather than going to the sign-up page and trying to join independently (for example, with an Organization Code).
- Any organization members — students, parents, or directors — who forget their password can click on the "Forgot Password" link on the login form to reset their password.