Who is this for? #
Any Admin or Admin Assistant who wants student and parent data synced into Presto automatically, so directors can use RosterSync instead of manually adding and updating members themselves.
What is Automatic Rostering? #
RosterSync needs a data source that keeps your roster data current. Presto supports two: ClassLink Rostering and SFTP Rostering. You only need to set up one — this is the first step in the RosterSync chain, before Manage RosterSync by Campus and Using RosterSync.
Choose a Rostering Source #
- ClassLink Rostering — Self-serve. Your district's Technology department enables Presto within ClassLink's Roster Server, then an Admin enables it in Presto's settings. Choose this if your district already uses ClassLink.
- SFTP Rostering — Presto-managed. Our team works with your Technology department to securely connect them to Presto's SFTP server. Choose this if your district doesn't use ClassLink but can export OneRoster files from your Student Information System.
Option A: ClassLink Rostering #
ClassLink offers a service called Roster Server that allows a ClassLink partner like Presto Assistant to bring in your student and parent data.
Enable ClassLink Rostering #
- Ask your district's Technology department to enable Presto Assistant for rostering. For detailed instructions, see ClassLink Rostering Setup (IT Step).
Tip
Until the Technology department enables ClassLink Rostering, Presto will not be able to access any student/parent data from ClassLink.
- Once your district has enabled rostering, go to the Integrations section on the Admin Portal settings page.
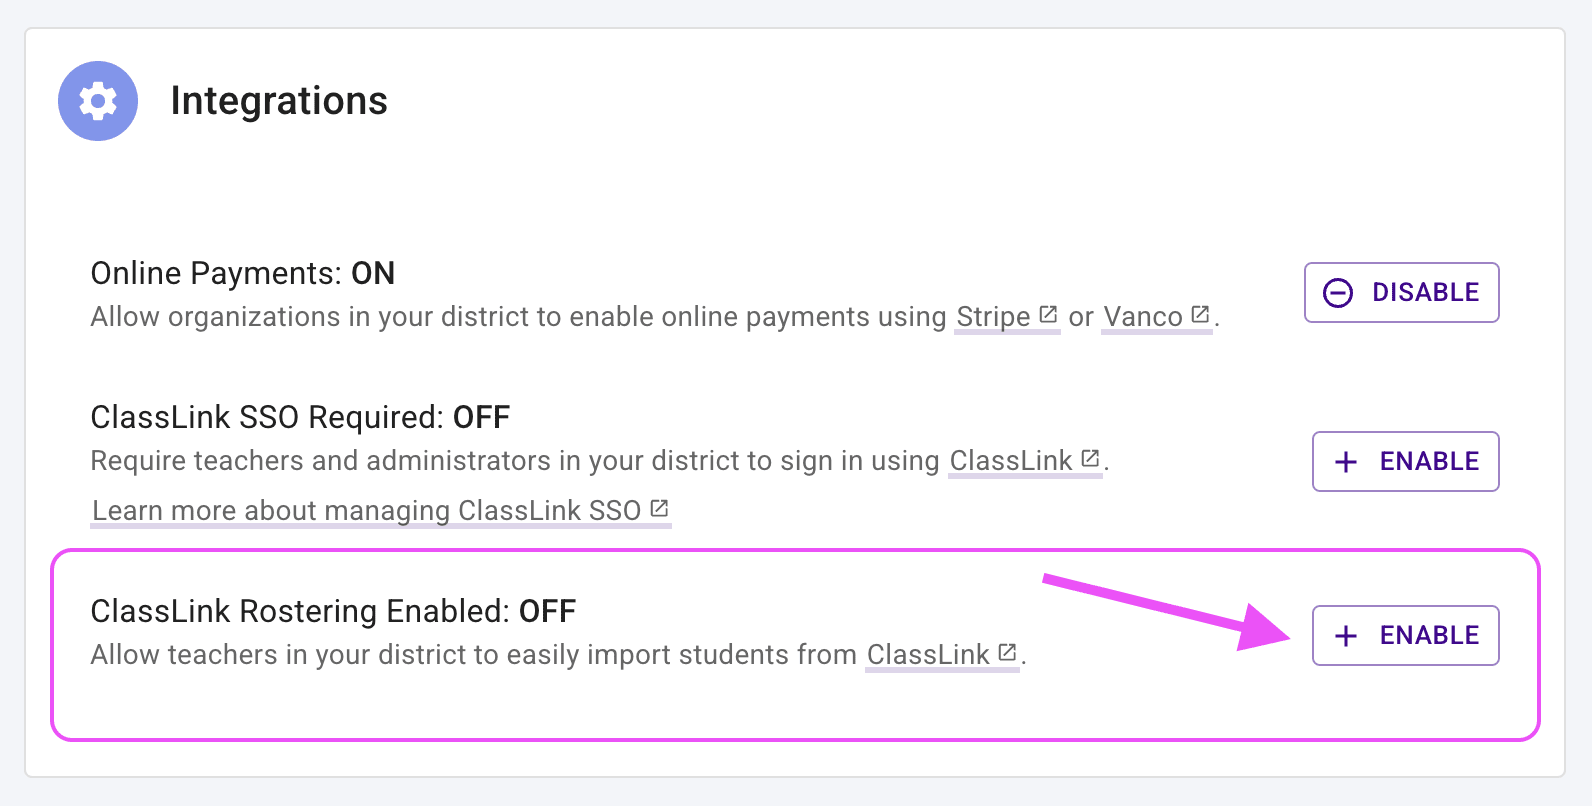
Our system will prompt you to sign in to ClassLink, if needed. Press the purple button in the confirmation dialog to continue to ClassLink. You will be brought back to Presto Assistant after you sign in.
When you return to Presto Assistant, confirm that you want to enable ClassLink Rostering.
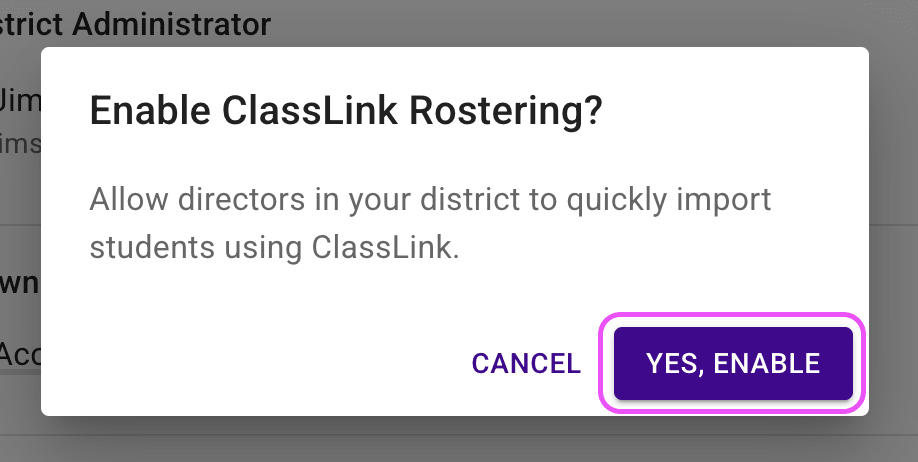
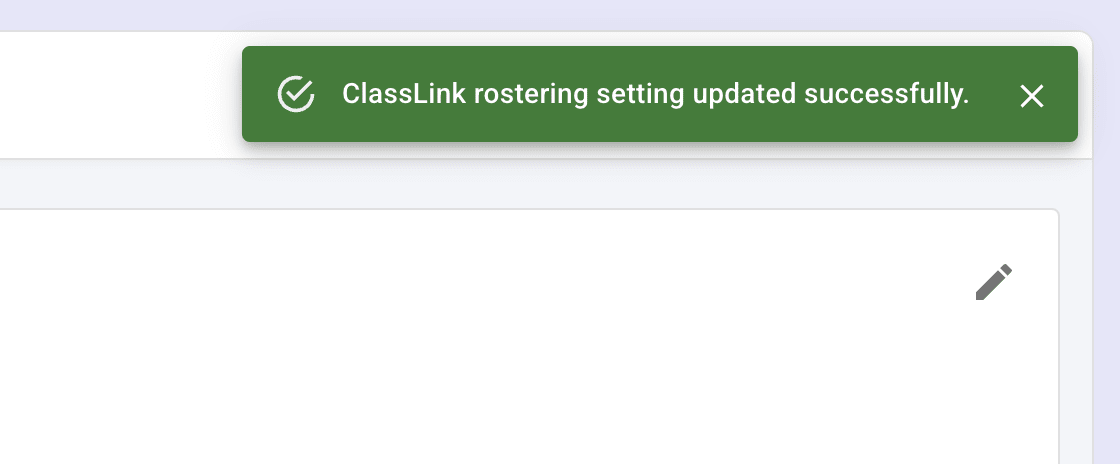
- Once you have enabled ClassLink Rostering, you will see a success notification in the top right corner of the screen.
Disable ClassLink Rostering #
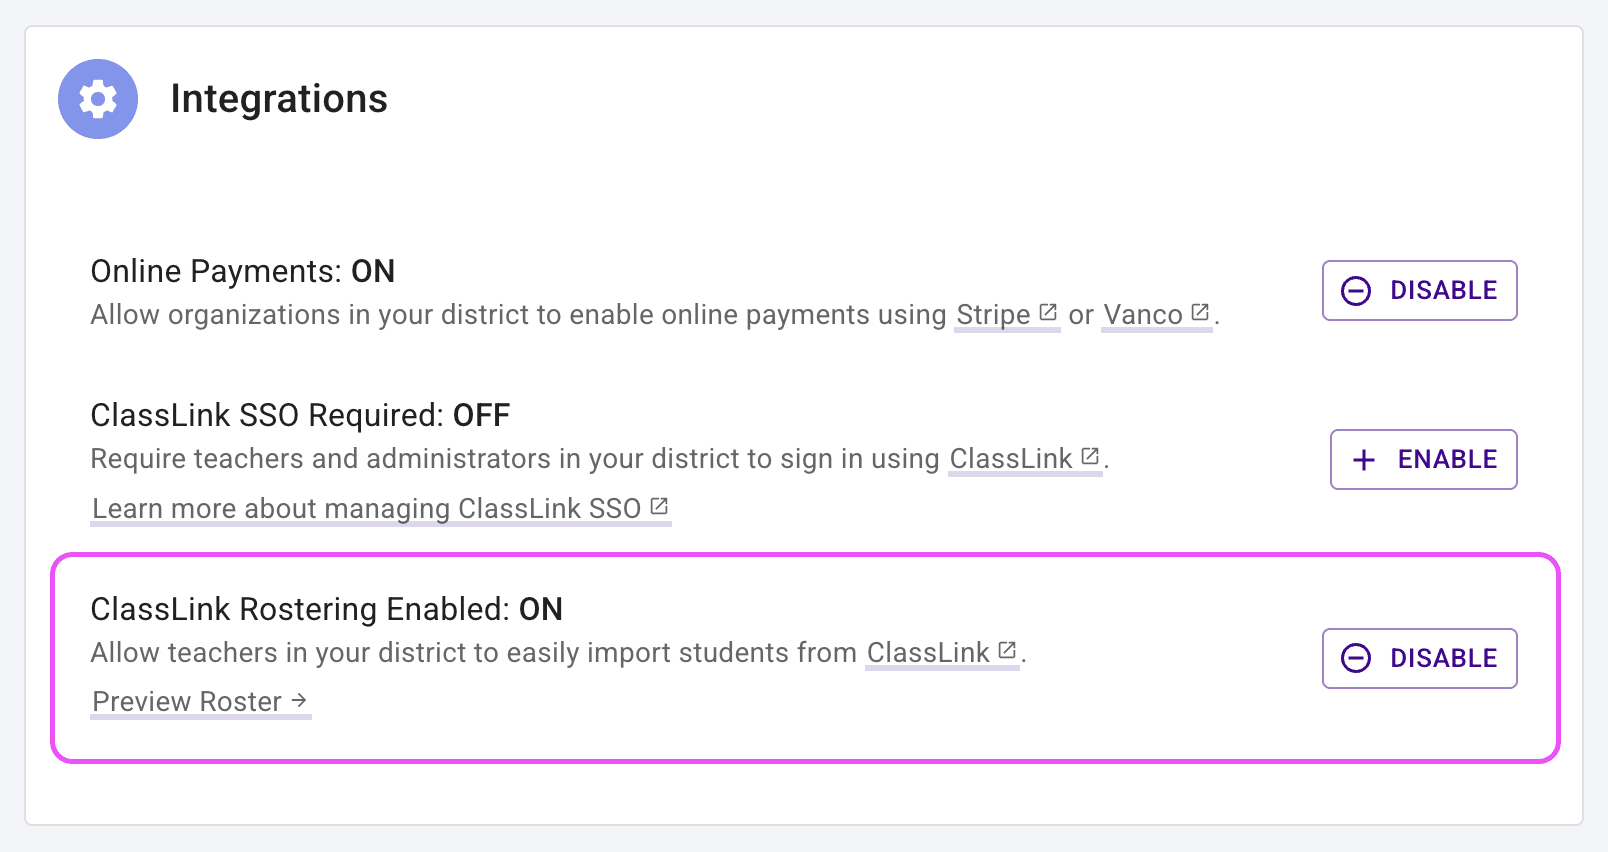
While viewing the Integrations section on the Admin Portal settings page, press the button labeled "Disable" to turn off ClassLink Rostering.
Option B: SFTP Rostering #
SFTP Rostering is a secure, automatic way to pull student and parent data out of your Student Information System and into Presto, so your rosters stay up to date without your directors having to enter or update that data by hand.
Presto doesn't integrate directly with any Student Information System — this is how districts using PowerSchool, Skyward, Infinite Campus, and similar systems bring their data in: your SIS exports OneRoster files, and those files come to Presto over SFTP. This covers the majority of districts, so if your district doesn't use ClassLink, this is almost certainly the option you want.
File requirements #
We're built and tested against OneRoster 1.1 CSV exports. A 1.2 export usually still works, since we only read the columns we need and ignore everything else — but 1.1 is what we officially support.
- Files we use:
orgs.csv,users.csv,classes.csv,demographics.csv, andenrollments.csv. - Not required:
courses.csvandacademicSessions.csvare accepted but not used by RosterSync. - Headers: not required to be complete — extra columns are ignored.
- Format: plain
.csvfiles, uncompressed (no zip), under 100 MB each.
What each file is used for #
orgs.csv: RosterSync reads your district's campuses. Admins match each campus to a Presto organization under RosterSync by Campus.classes.csv: RosterSync reads each class's title and the campus it belongs to. Directors connect their groups to these classes on Connect Groups to Classes, where classes are listed by title and grouped by campus.enrollments.csv: RosterSync reads which students are in which class, so directors can add those students to a connected group. Rows for sections a student has already left (an end date in the past) are skipped.users.csv: RosterSync reads each student's name (first, middle, and last), email, phone, grade, and district student ID. It also reads up to two linked parents or guardians per student: name, email, and phone. Presto fills in these details when directors add students to their group.demographics.csv: RosterSync reads each student's date of birth and gender, and fills them in on newly added students. Gender values Presto doesn't recognize (for example, "unspecified") are left blank.
courses.csv and academicSessions.csv are accepted but not used today, and any extra columns in any file are ignored.
Files are processed overnight, so directors see changes the next day.
Tip
This connection has to be set up with your district's IT department directly by our team — it isn't something you configure yourself in Presto. This lets your district securely connect to Presto's SFTP server, without asking your IT department to change anything about how their own systems are secured.
Contact us to let us know you'd like to set up SFTP Rostering, and copy your district's Technology department on that message.
What happens next:
- Our team works with your district's Technology department to help them securely connect to our SFTP server.
- Once connected, Presto automatically checks for new or updated OneRoster files (see File requirements above) on a nightly schedule.
- Once your data is flowing in, follow the Next steps below to get your organizations and directors set up.
Next steps #
- Manage RosterSync by Campus — match your campuses to Presto organizations so directors can start using RosterSync.
- Share Using RosterSync with your directors so they can connect their groups to rostered classes and review incoming roster changes.
Troubleshooting #
- If you see an error like "ClassLink rostering application not found", your district has not enabled ClassLink Rostering. Ask your Technology department to "Enable Presto Assistant for rostering". For detailed instructions, see ClassLink Rostering Setup (IT Step).