Prerequisites #
- You should already have student records in Presto Assistant. This article is for updating existing students.
- If you haven't added your students yet, see Import Student Data instead.
- Your Presto Assistant account needs permission to edit Students. Directors, Admins, and Admin Assistants typically have this permission.
Open the Import Dialog #
- From the Students table, click the triple-dot "More Actions" icon button at the top right of the table, then click Import student updates.
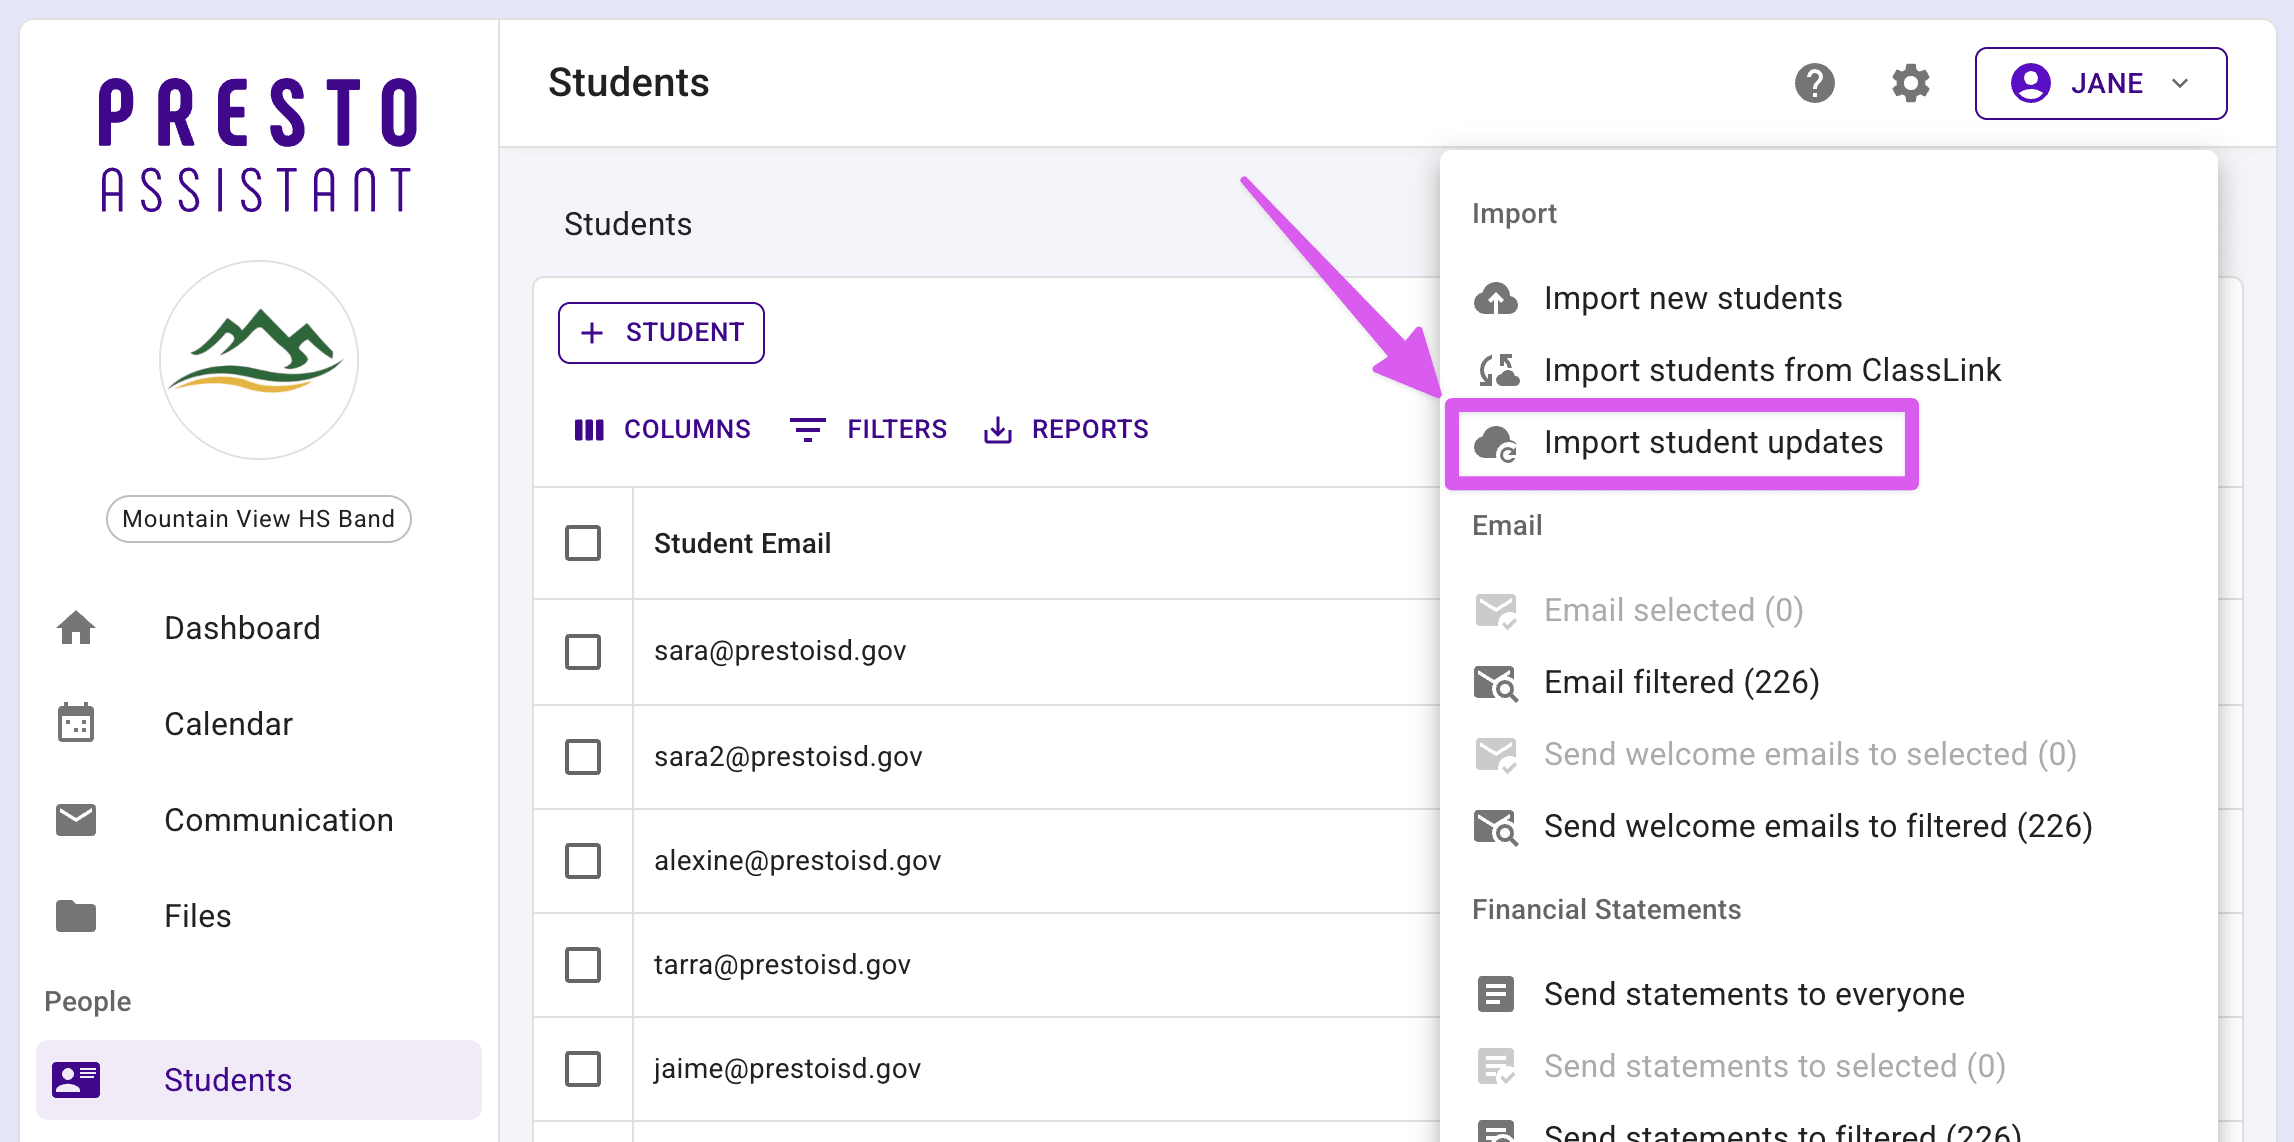
The dialog gives you two ways to bring in your file:
- Option 1: Use Our Template — start here if you haven't already built your file.
- Option 2: Use Your Own File — use this if you already have a properly-formatted CSV ready to go.
Option 1: Use Our Template #
Best for updating data you already have in Presto (correcting addresses, filling in missing phone numbers, etc.) since it lets you start from your existing student list instead of building a file from scratch.
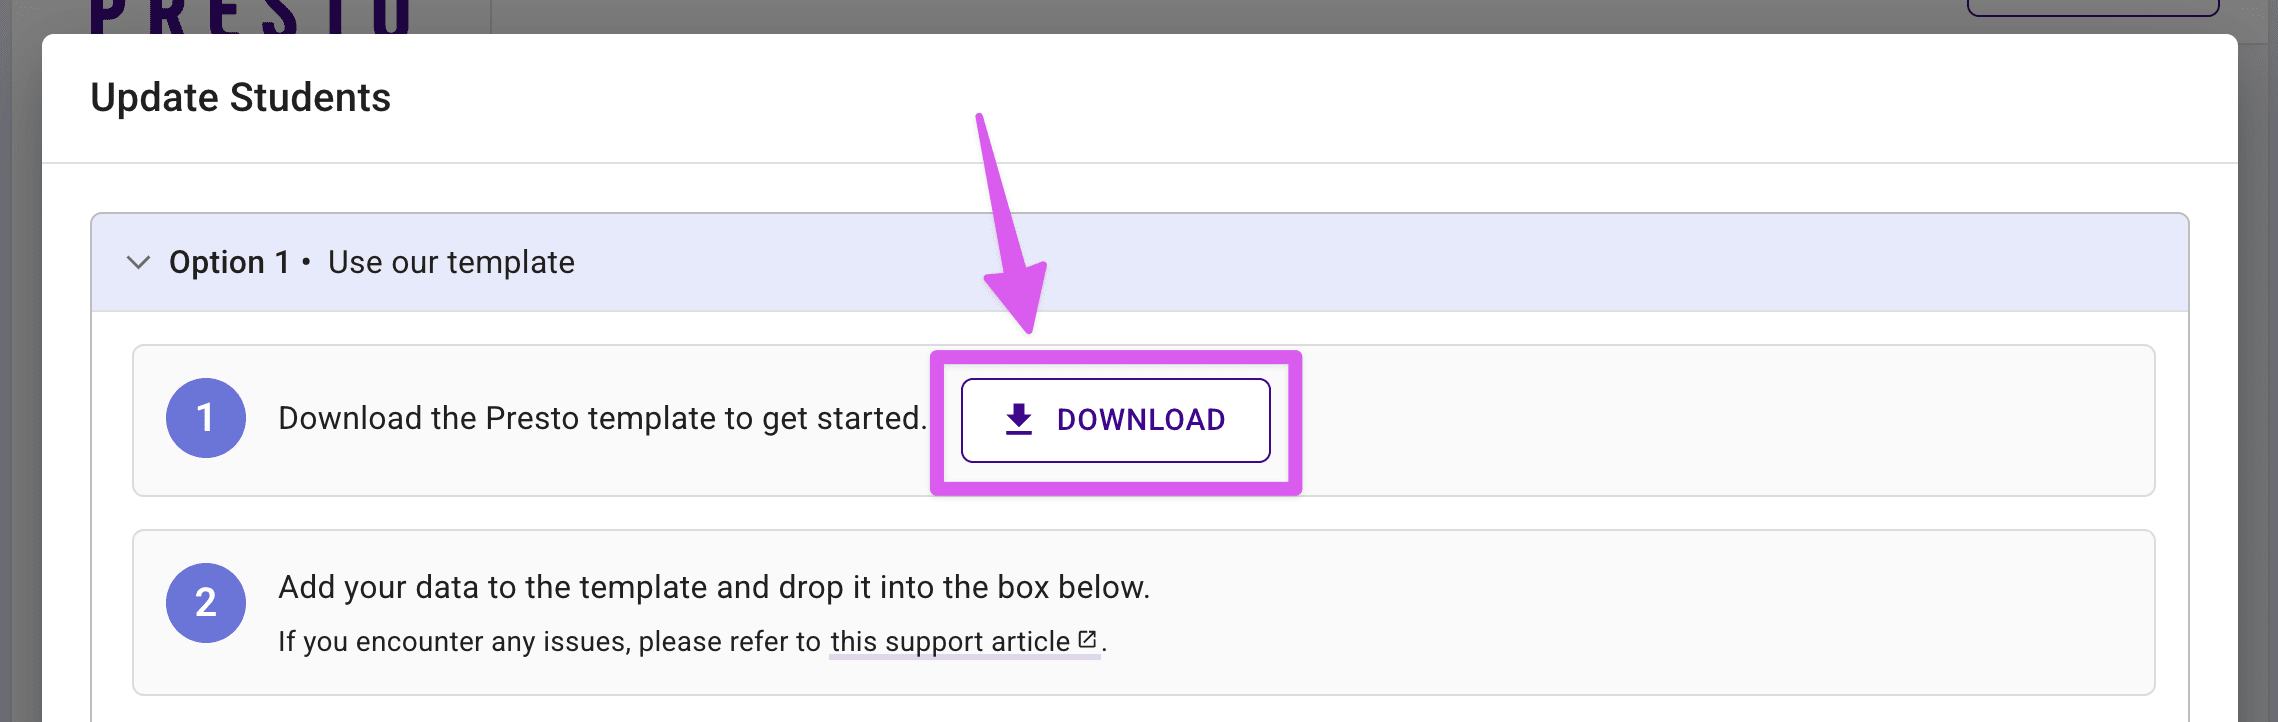
- In the dialog, download the template file.
- The template includes every column header available for updates, both REQUIRED and OPTIONAL.
- If your Admin Portal has Dynamic Fields set up, you'll see column headers for those too.
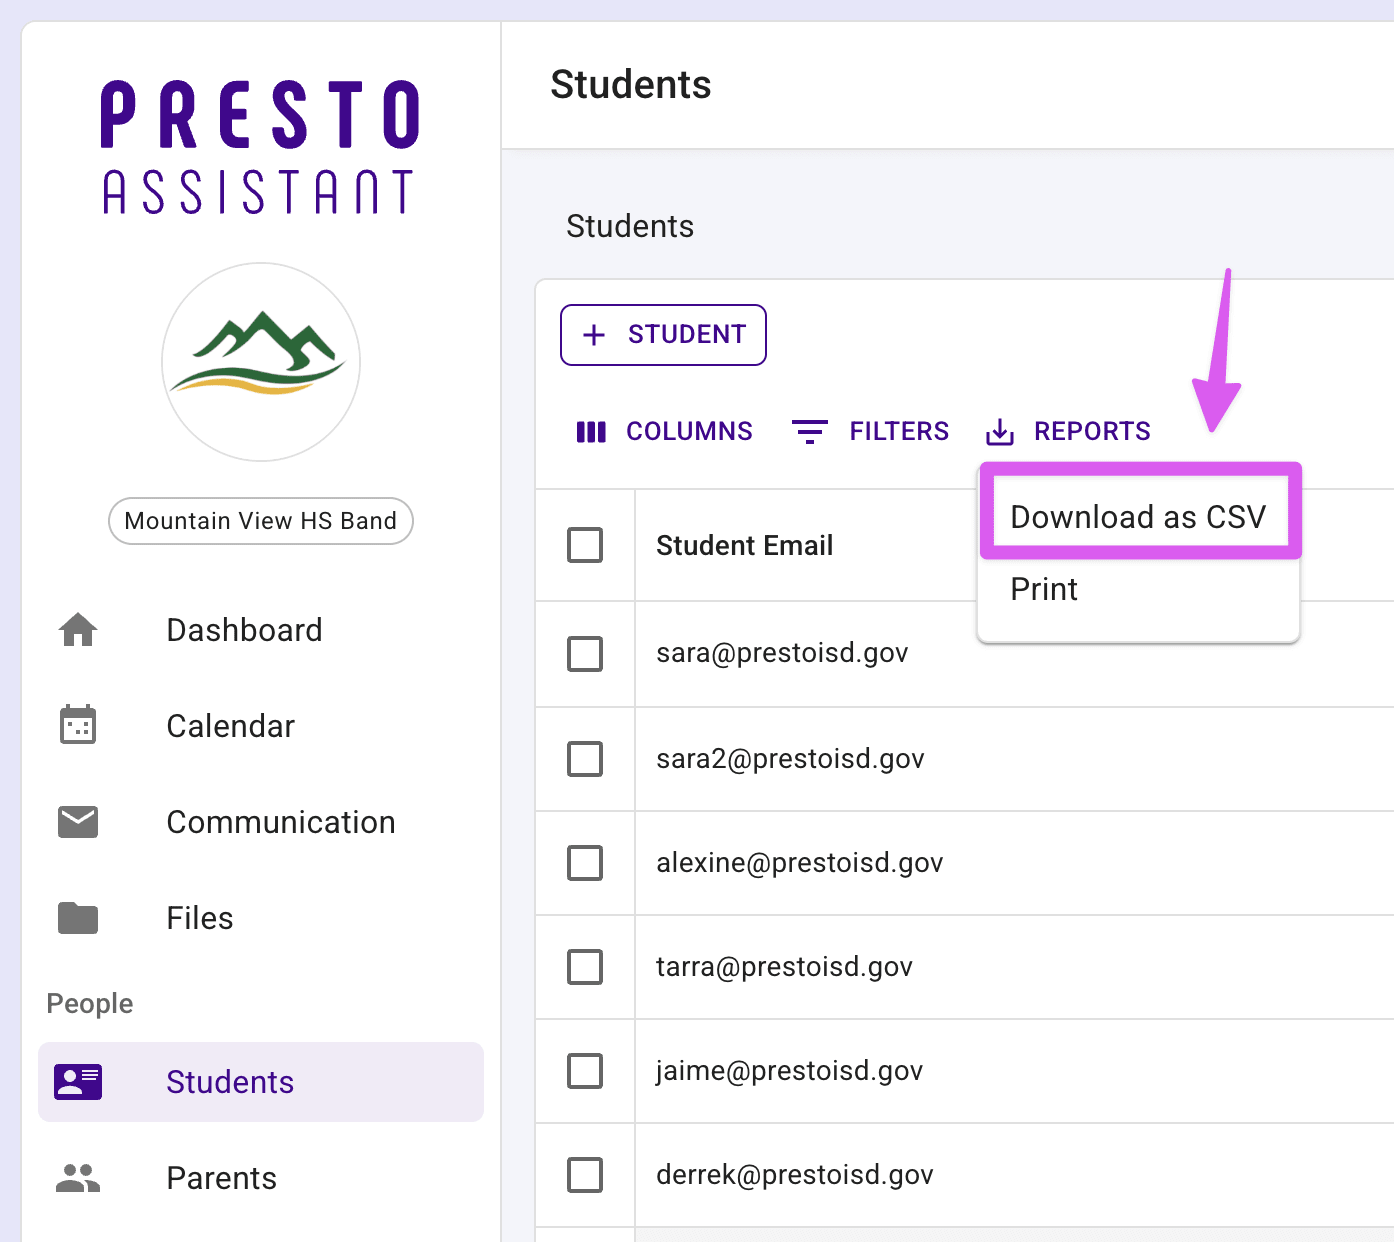
- Now, let's export your existing student data. Back on the Students table, set Columns to show only Student Email (or Student ID), then press Reports and select Download as CSV.
- Copy that Student Email (or Student ID) column into the template's member column. This guarantees the column Presto needs to match each row to a student is named and filled in correctly.
- Fill in the rest of the template with whatever data you want to change, then save the file as CSV.
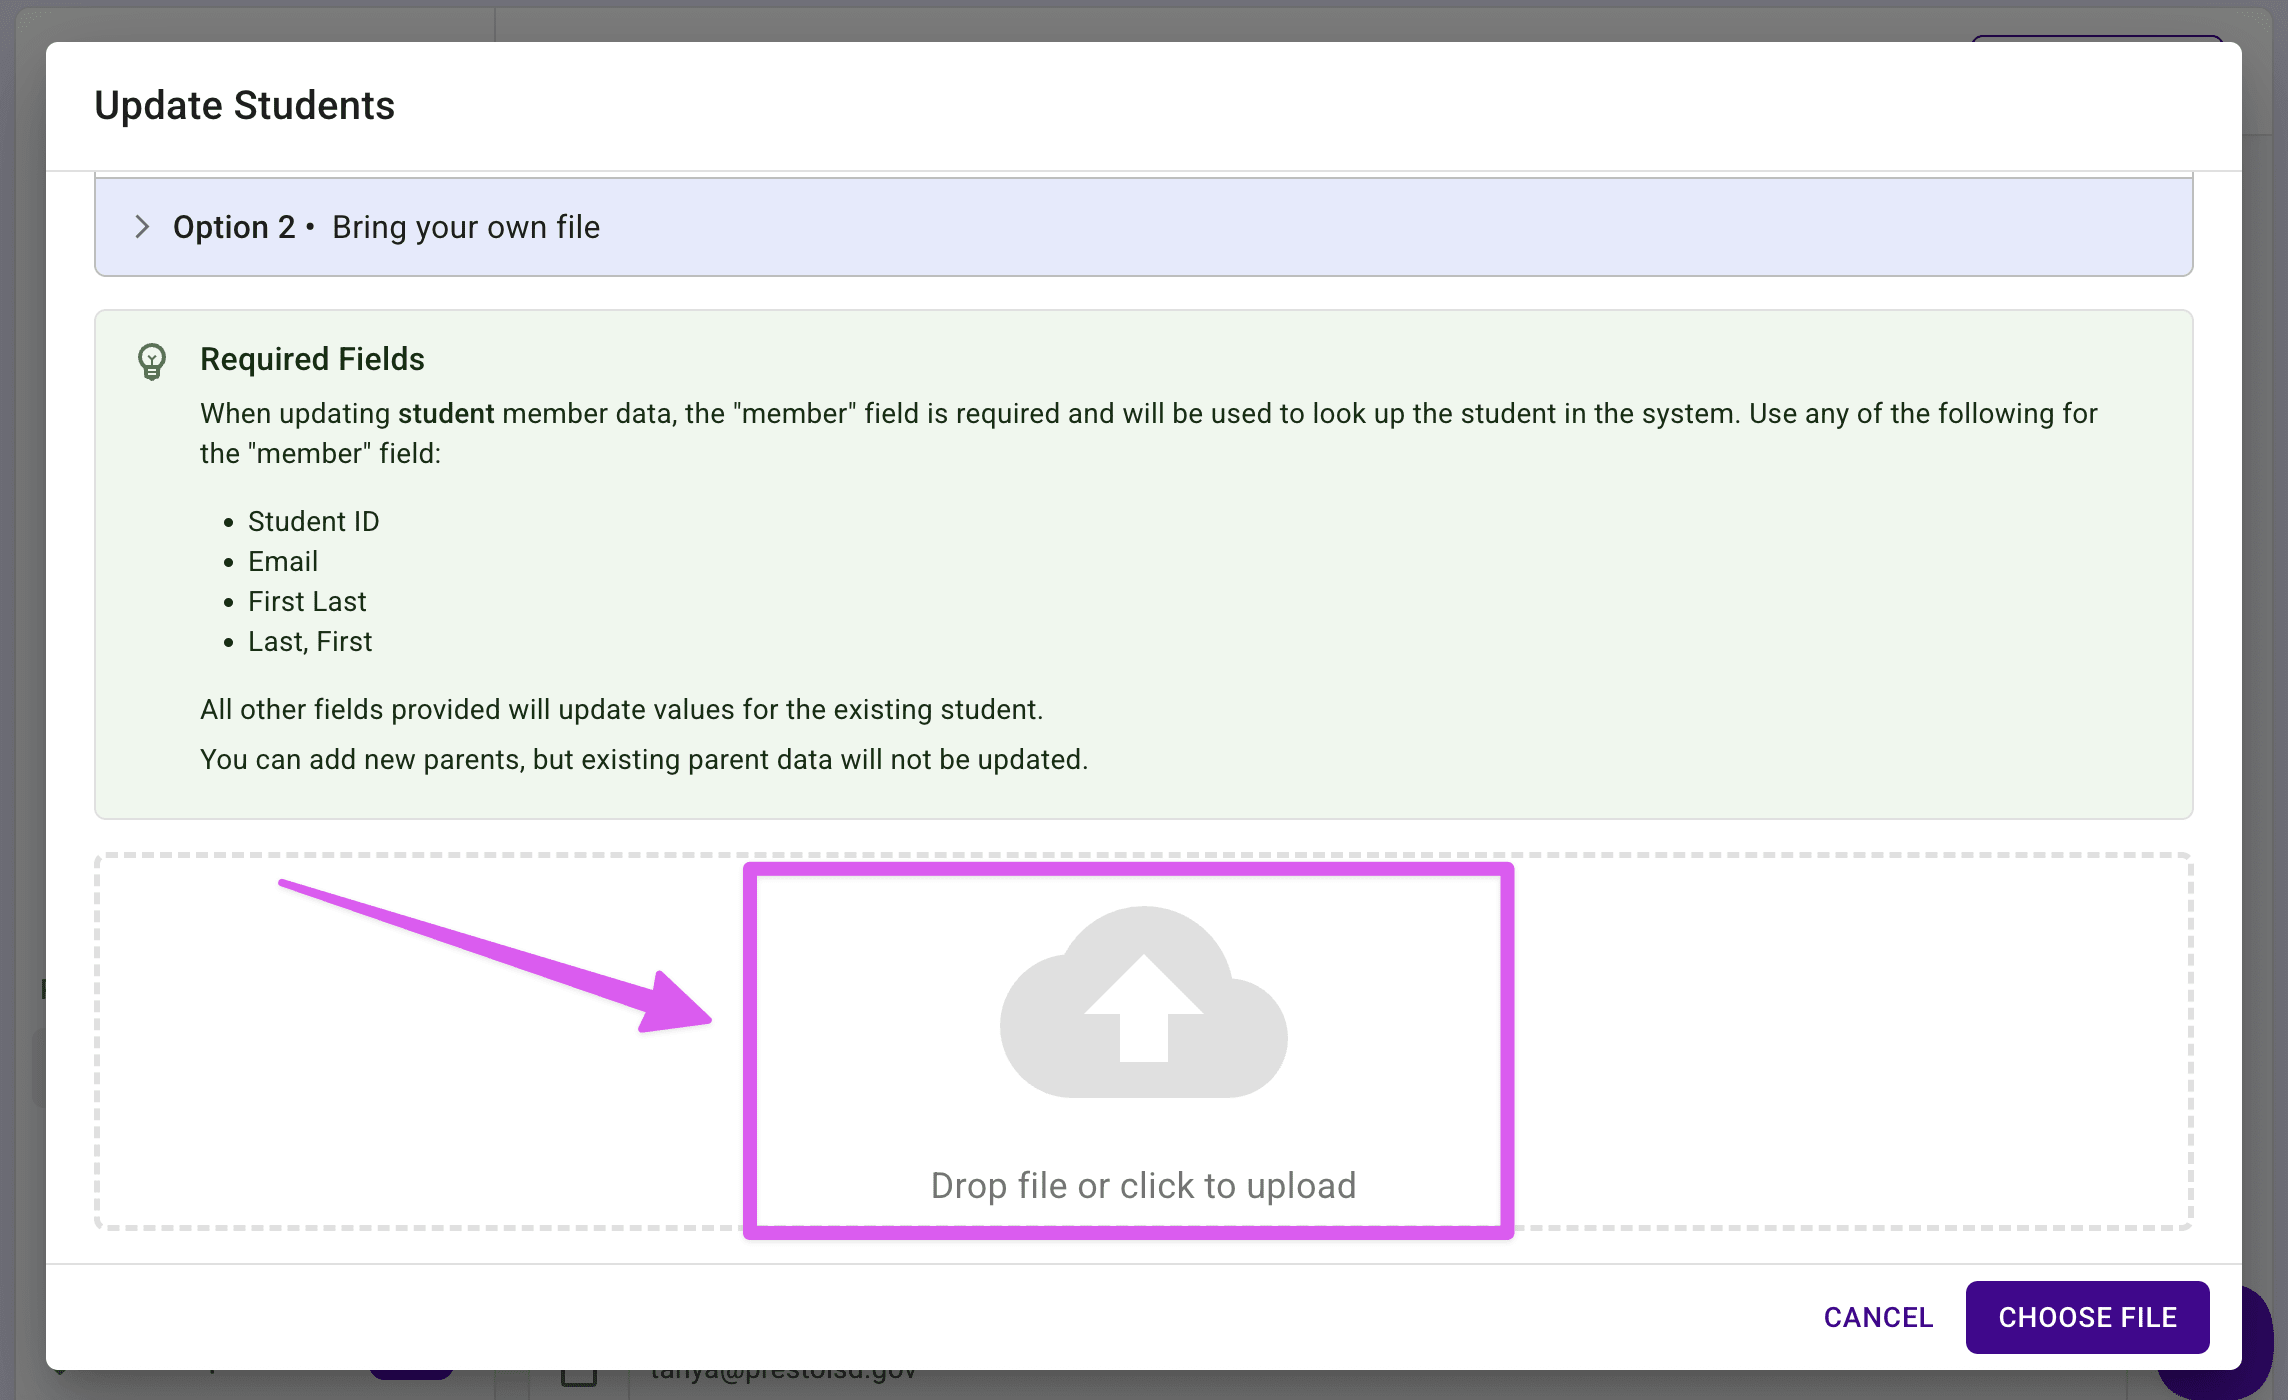
- Back in the dialog, drop the completed template CSV file onto the cloud icon.
Option 2: Use Your Own File #
Best if you already have a list of changes from somewhere else — for example, a list of updated addresses or phone numbers from your school district — since you don't need to touch Presto's own data first.
Open the CSV file that contains your data.
- If you have a file in another format like XLS, use your spreadsheet program to export the data to "Comma-separated Values" (CSV) format for use with Presto.
In the dialog, press the arrow next to "Option 2".
Make sure your file includes a member column, plus a column for each field you want to update. Header names should use the Presto Assistant column format.
Tip
The member value can be any one of the following:
- The student's Student ID
- The student's email address
- The student's full name, formatted as "First Last"
- The student's full name, formatted as "Last, First"
Remove any extra columns and save the file.
Drop the updated CSV file onto the cloud icon.
Preview and Finish Importing #
After uploading your CSV, you'll be shown a preview of the "good" and "bad" rows that we detect, flagging any issues that are found.
- If bad rows are present, you can still import the rest of the data. The system will ignore the bad rows.
- See the Troubleshooting section below for more help.
If all data looks good, then press the purple Import button. Your changes will be applied immediately.
Data Types #
The columns you can include for updates are the same fields available when importing new students, with the exception of the member column described above.
See the Import Student Data article for the full list of available fields and their expected formats.
Tip
This import only updates fields you include in your CSV — leave a column out entirely if you don't want to touch that data.
Linking Parents #
You can use this import to link a parent/guardian to a student, in addition to updating the student's own data.
- If the Parent One or Parent Two Email you include matches an existing Adult account in Presto, that adult is automatically linked to the student as Family — you don't need to do anything else to connect them.
- If the email doesn't match an existing Adult account, a new Adult account is created and linked automatically, the same as when importing brand-new students.
- This import will not update an existing parent's own information (name, phone, etc.) — it only handles matching and linking. To change details for a parent who is already in the system, edit that parent's record directly.
Troubleshooting #
- Presto will let you know if any rows have invalid data, listing the row number and the specific issue for each one, including an unrecognized or ambiguous member value.
- Use the "download your CSV with errors" link to get a copy of your file with those issues noted, so you can fix them and re-upload.
- You can also choose to import all of the good rows right now and come back to fix the rest later.
- If a student's information doesn't seem to update after import, confirm the member value in that row actually matched the intended student — check the student's Student ID or email directly if you're unsure.